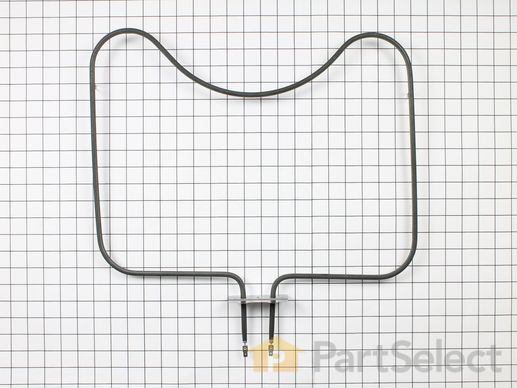
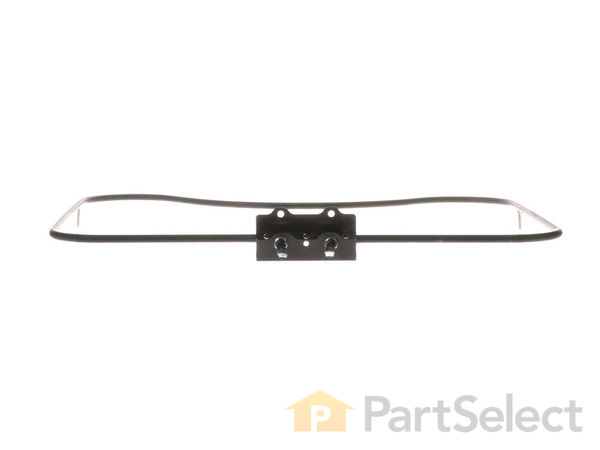
Part Location Diagram of WPY04100019 Whirlpool Bake Element (16 Inch long x 19 Inch wide)
See part 2 in the diagram
( Grid squares measure 1x1 inch )
Customer Service Representative

Get in touch, we're here to help!

Daily 8am - 9pm EST

customerservice@partselect.com

Bake Element (16 Inch long x 19 Inch wide) WPY04100019

★★★★★
★★★★★
9 Reviews

Rated by 41 customers 

Really Easy 

15 - 30 mins 

Ratings submitted by customers like you who bought this part.

$ 102.13
  In Stock
Get FREE EconoShip on orders over $100! T&C apply

Get this part fast! Average delivery time for in-stock parts via standard shipping: 1.8 days.

PartSelect Number PS11757475
Manufacturer Part Number WPY04100019
Manufactured by Whirlpool
Product Description

Bake Element (16 Inch long x 19 Inch wide) Specifications

This electric oven bake element with screw in wire terminals is 19 inches wide. It has a terminal depth of three inches and a total element length of nineteen inches. This element is intended for use with some electric ovens.
How Buying OEM Parts Can Save You Time and Money

How Buying OEM Parts Can Save You Time and Money

Troubleshooting
This part fixes the following symptoms:
Little to no heat when baking | Element will not heat | Oven not heating evenly
This part works with the following products:
Range, Wall Oven.
This part works with the following products:
Jenn-Air, Kenmore, Maytag, Hoover.
Part# WPY04100019 replaces these:
AP6024125, 04100019, 5-70066, 570066, 7-2550, 702550, Y04100019, Y702550
Back to Top
Customer Reviews
Average Rating:
★★★★★
★★★★★
9 Reviews
4.8
Filter By Rating:
  • 5 Stars
    8
  • 4 Stars
    0
  • 3 Stars
    1
  • 2 Stars
    0
  • 1 Star
    0
Sort by:
  • 1
Sorry, we couldn't find any existing reviews that matched. Try using some different or simpler keywords.
  • 1
Customer Repair Stories
 Average Repair Rating: 4.2 / 5.0, 41 reviews. What's this?
Sort by:
  • 1
  • 2
  • 3
Sorry, we couldn't find any existing installation instruction that matched.
The bake element had burned out
Regrettably I have been unable to replace the bake element since the two screws are completely stuck. This doesn't appear to be a common problem.
  • S from Washington, DC
  • Difficulty Level:
    Very Difficult
  • Total Repair Time:
    More than 2 hours
  • Tools:
    Screw drivers, Wrench (Adjustable)
1 person found this instruction helpful.
Was this instruction helpful to you?
Thank you for voting!
bake element weakened
As described elsewhere. If the two retaining screws are rusty, order new ones with the element. They are expensive, so take them out and check before placing the element order. Save time and shipping costs.
  • jackie from FERNANDINA, FL
  • Difficulty Level:
    Very Easy
  • Total Repair Time:
    Less than 15 mins
  • Tools:
    Screw drivers
2 of 2 people found this instruction helpful.
Was this instruction helpful to you?
Thank you for voting!
oven heating element burned out
Shut off electrical breaker to stove. Unscrew & remove heating element with standard screwdriver. Since screw threads were stripped I used a longer screw I wrapped thread with teflon tape. Connect new heating element & crimp connectors to ensure contact is made, push wires back & tighten screws. Turn power breaker back on & we have a new oven!
  • Michael from Hillsborough, NJ
  • Difficulty Level:
    Easy
  • Total Repair Time:
    15 - 30 mins
  • Tools:
    Pliers, Screw drivers
1 of 2 people found this instruction helpful.
Was this instruction helpful to you?
Thank you for voting!
Oven element would not heat
Removed the element and did a continuity check, the element was bad. The stove is over 25 yrs. old. Went to a local shop who usually are very good in situations like this. They could not find the part. Went on line to Part Select, found the part and verified with a phone call. Ordered and received the part the next morning and fixed the stove.
  • Patricia from Saint Lewis, MO
  • Difficulty Level:
    Easy
  • Total Repair Time:
    15 - 30 mins
  • Tools:
    Screw drivers
0 of 1 people found this instruction helpful.
Was this instruction helpful to you?
Thank you for voting!
The bake element burned out
The element is held in by two screws located at the rear of the oven. After killing the power, I unscrewed the two screws (one was stripped so I used a pliers to remove it) and replaced them with 2 new screws. Total time was about 20 minutes. Easy fix!
  • Barry E from Rockville Centre, NY
  • Difficulty Level:
    Easy
  • Total Repair Time:
    15 - 30 mins
  • Tools:
    Pliers, Screw drivers
0 of 1 people found this instruction helpful.
Was this instruction helpful to you?
Thank you for voting!
no problem
my wife did the chaging as i am unable to work on anything
  • Willard H . from Harrison, AR
  • Difficulty Level:
    Really Easy
  • Total Repair Time:
    Less than 15 mins
  • Tools:
    Nutdriver, Pliers
0 of 1 people found this instruction helpful.
Was this instruction helpful to you?
Thank you for voting!
broken baking element
My Neighbor took about 5 min to put the new part in place. very easy!!!one screw was tough to remove but that was the hard part. It was very simple to do.
  • marion from sanford, ME
  • Difficulty Level:
    Really Easy
  • Total Repair Time:
    Less than 15 mins
  • Tools:
    Screw drivers
0 of 2 people found this instruction helpful.
Was this instruction helpful to you?
Thank you for voting!
Burnt out oven element, faulty surface burner switch
As an arthritic 83 yr old I had a little trouble removing the two screws holding old element but with penetrating oil and channel locks on the screwdriver for leverage that problem was solved. Installation of new element was a snap, a matter of minutes to connect the element spades to the wire contacts and relace the two screws holding the element to the oven cabinet.

To remove the old switch I removed the four screws holding the control panel (Oven door must be open to get at screws)Removing the old switch took a few more minutes as with age of the unit the male spade contacts of the switch were tight on the female wire contacts and I carefully used needle nose pliers to free them. I quickly learned not to remove the two screws holding the switch to the panel until the switch spades were free from the female wire contacts. Installation of the new switch was easy. I replaced the panel with four screws, checked everything, reset the circuit breaker and I was back in business.
Other Parts Used:
Bake Element (16 Inch long x 19 Inch wide) Surface Burner Switch - 240V
  • Thomas from Burlington, MA
  • Difficulty Level:
    Easy
  • Total Repair Time:
    30 - 60 mins
  • Tools:
    Pliers, Screw drivers
0 of 2 people found this instruction helpful.
Was this instruction helpful to you?
Thank you for voting!
Baking element failed to heat while broiling element continued to function properly.
AFTER turning off the power supply to the range/cooktop, remove 2 screws holding element in place then remove two slip electrical connectors, and remove element. Reverse procedure for installation of replacement.
  • Harold from Encinitas, CA
  • Difficulty Level:
    Easy
  • Total Repair Time:
    15 - 30 mins
  • Tools:
    Screw drivers
0 of 1 people found this instruction helpful.
Was this instruction helpful to you?
Thank you for voting!
bake element not working
Removed 2 screws from back of oven. Pulled element away from the back,disconnected the 2 wires. Recieved new part in 2 days and installed in reverse order.
  • Todd from Schuylkill Haven, PA
  • Difficulty Level:
    Really Easy
  • Total Repair Time:
    Less than 15 mins
  • Tools:
    Screw drivers
0 of 1 people found this instruction helpful.
Was this instruction helpful to you?
Thank you for voting!
  • 1
  • 2
  • 3
Questions and Answers

Ask our experts a question about this part and we'll get back to you as soon as possible!

2 questions answered by our experts.
Sort by:
  • 1
Sorry, we couldn't find any existing answers that matched.Try using some different or simpler keywords, or submit your new question by using the "Ask a Question" button above!
Pat
December 17, 2019
Part no. Wpy04100019 -- what is the wattage on this bake element?
For model number CDE850
PartSelect logo
Hello Pat and thanks for writing. 1950/2600 Watt 208/240 Volt. We hope this helps. Please contact us anytime.

2 people found this helpful.

Was this helpful?
Thank you for voting!
Lawrence
April 18, 2023
Tried to remove bake element and one screw broke loose but then it just spins and won't come out.
For model number s125
PartSelect logo
Hi Lawrence, thank you for reaching out. Following these instructions may help you. First, shut off the power to the appliance. Remove the back panel to disconnect the bake element terminal wires. After that, remove the broiler pan and rack from the oven. Remove the screws securing the bottom panel. Locate the bake element and remove all the screws attached to it. We hope this information is useful!

1 person found this helpful.

Was this helpful?
Thank you for voting!
  • 1
Model Cross Reference
This part works with the following models:
PartSelect Number: PS11757475
Manufacturer Part Number: WPY04100019
Brand
Model Number
Description
Kenmore
20133
Range - Kenmore Range/Stove/Oven Model 20133(1988) Parts
Jenn-Air
20135
Range
Kenmore
20214
Range - Electric Range
Kenmore
20215
Range - Electric Range
Kenmore
20234
Range - Kenmore Range/Stove/Oven Model 20234(1988) Parts
Jenn-Air
20236
Range
Jenn-Air
20237
Range
Kenmore
62920236
Range - Kenmore Range/Stove/Oven Model 629.20236 (62920236, 629 20236) Parts
Kenmore
62920237
Range - Kenmore Range/Stove/Oven Model 629.20237 (62920237, 629 20237) Parts
Maytag
CDE820
Range - Electric
Maytag
CDE850
Range - Electric
Maytag
CDE851
Range - Electric
Jenn-Air
D140
Range
Jenn-Air
D140-C
Range
Jenn-Air
D146
Wall Oven
Jenn-Air
D146-C
Wall Oven
Jenn-Air
D146W
Wall Oven - Freestanding, Electric
Jenn-Air
D156
Wall Oven
Jenn-Air
D156B
Range - Freestanding, Electric
Jenn-Air
D156W
Range - Freestanding, Electric
Hoover
S100
Range
Jenn-Air
S101
Range
Jenn-Air
S105
Range
Jenn-Air
S105-C
Range
Jenn-Air
S120
Range - Downdraft, Electric
Jenn-Air
S120-C
Range - Freestanding, Electric
Jenn-Air
S125
Range - Downdraft, Electric
Jenn-Air
S125-C
Range - Downdraft, Electric
Jenn-Air
S160
Range - Slide-in, Electric
Jenn-Air
S160-C
Range - Slide-in, Electric
Customer Service Representative

Get in touch, we're here to help!

Daily 8am - 9pm EST

Contact Customer Service