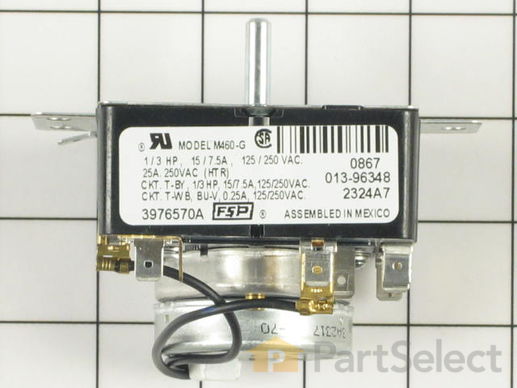
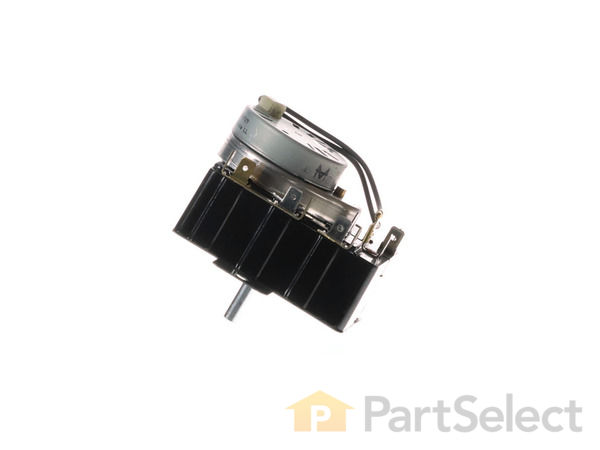
Part Location Diagram of WP3976570 Whirlpool Timer
See part 3 in the diagram
( Grid squares measure 1x1 inch )
Customer Service Representative

Get in touch, we're here to help!

Daily 8am - 9pm EST

customerservice@partselect.com

Timer WP3976570

★★★★★
★★★★★
4 Reviews

Rated by 12 customers 

Really Easy 

15 - 30 mins 

Ratings submitted by customers like you who bought this part.

$ 215.20
  In Stock
Get FREE EconoShip on orders over $100! T&C apply

Get this part fast! Average delivery time for in-stock parts via standard shipping: 1.8 days.

PartSelect Number PS11742163
Manufacturer Part Number WP3976570
Manufactured by Whirlpool
Product Description

Timer Specifications

This dryer timer is used to control the unit's cycles by regulating the length of time that power is directed to each setting.
How Buying OEM Parts Can Save You Time and Money

How Buying OEM Parts Can Save You Time and Money

Troubleshooting
This part works with the following products:
Dryer.
This part works with the following products:
KitchenAid, Whirlpool.
Part# WP3976570 replaces these:
AP6009021, 3406708, 3976570
Back to Top
Customer Reviews
Average Rating:
★★★★★
★★★★★
4 Reviews
5.0
Filter By Rating:
  • 5 Stars
    4
  • 4 Stars
    0
  • 3 Stars
    0
  • 2 Stars
    0
  • 1 Star
    0
Sort by:
  • 1
Sorry, we couldn't find any existing reviews that matched. Try using some different or simpler keywords.
  • 1
Customer Repair Stories
 Average Repair Rating: 4.1 / 5.0, 12 reviews. What's this?
Sort by:
  • 1
  • 2
Sorry, we couldn't find any existing installation instruction that matched.
motor probiem
very easy to install with video
Other Parts Used:
Timer Push-to-Start Switch
  • Ortiz from South Bay, FL
  • Difficulty Level:
    Very Easy
  • Total Repair Time:
    1- 2 hours
  • Tools:
    Nutdriver, Pliers, Screw drivers, Wrench (Adjustable), Wrench set
1 person found this instruction helpful.
Was this instruction helpful to you?
Thank you for voting!
The timer went out and the repair people wanted $350
I took off the back panel, disconnected 7 wires, while using needle-nose pliers with minimal force, and installed the new unit in less than 10 minutes. This saved me almost $200.
  • JAMES from SAN JOSE, CA
  • Difficulty Level:
    Very Easy
  • Total Repair Time:
    Less than 15 mins
1 person found this instruction helpful.
Was this instruction helpful to you?
Thank you for voting!
Dryer Would Not Shut Off Automatically. Timer Was Not Advancing In Any Position.
Unplugged electrical cord. Disconnected 4'' air vent. Slid dryer out from wall to gain access to back cover of the control panel. Removed cover (six screws) with 1/4" nut driver. Removed knob from timer (slides off and on). Looking at rear of timer, there are two 1/4 " hex head screws that hold timer to mounting plate. Removed timer by removing those screws. Began at a predetermined terminal to remove wires from old timer and place these on the new one. Going counter-clock-wise one wire connection at a time the wire connecters slid off the old and on to the new terminals very easily. Reversed procedure in putting things back together and found that the dryer worked perfectly. Thanks for the video.
  • Jesse from Antioch, TN
  • Difficulty Level:
    Easy
  • Total Repair Time:
    15 - 30 mins
  • Tools:
    Nutdriver, Pliers, Screw drivers
2 of 5 people found this instruction helpful.
Was this instruction helpful to you?
Thank you for voting!
Dryer would not cut off automatically. Timer not functioning
Disconnected dryer from the electric supply.
Removed panel at rear of Control Console and loosened the 2 screws fastening the timer to the console.
Moved the old timer to left and screwed new timer in place.
Because of the number of electrical connections to be re- attached I decided to disconnect the wires from the old timer one at a time,starting from the left side and moving the terminals directly to the corresponding terminals on the new timer.This sequence ensured that I got each wire on the correct terminal and avoided having a lot of loose wires to choose from. The push-on terminals came off easily and pushed onto the new timer easily.
I rescrewed the back-plate to the control console,plugged in the dryer to the mains electrical supply and ran the dryer. It worked beautifully.
  • Alfred from Berkeley Heights, NJ
  • Difficulty Level:
    Easy
  • Total Repair Time:
    1- 2 hours
  • Tools:
    Nutdriver, Pliers, Screw drivers, Socket set
5 of 6 people found this instruction helpful.
Was this instruction helpful to you?
Thank you for voting!
Dryer will not start
One night my wife could not start the Dryer. I took a look at it and realized that the timer still advances, but it will not start.

I called a repair man to take a look at it and he confirmed that it was the timer. He said the total repair will cost me aroun $270.00 Parts and Labor.

I then came online and found partselect.com. I searched for the model number of the dryer, used the repair man tool and found what I was looking for.

It took me less then 10 minutes to take apart the dryer and replace the new part. I saved over $180.00 on labor.

To install,I unplugged the dryer from the power. I unscrewed the dryer top and pulled it out. I then unscrewed the timer and disconnected the wires and reconnected the wires to the new timer.

Screwed back the timer in place and screwed back the face plate. Plugged in the dryer, selected a timer setting and pressed the start button. My wife thinks I am a hero.

Thank you Partselect for the great service.

Ruby
  • Ruby from Dearborn, MI
  • Difficulty Level:
    Really Easy
  • Total Repair Time:
    Less than 15 mins
  • Tools:
    Screw drivers, Socket set
4 of 6 people found this instruction helpful.
Was this instruction helpful to you?
Thank you for voting!
Dryer would not start
Replacing the part was easy, diagnosing the problem took 5 visits from the repair service and 2 calls to the manufacturer over the course of nearly 2 month. Once I was confident that the problem had been correctly diagnosed, I went online to order the part and installed it myself in less than 15 minutes. The part arrived sooner than anticipated at a price 33% less than that quoted by the service company.
  • Tim from Bethesda, MD
  • Difficulty Level:
    Easy
  • Total Repair Time:
    Less than 15 mins
  • Tools:
    Screw drivers
2 of 2 people found this instruction helpful.
Was this instruction helpful to you?
Thank you for voting!
The dryer never stop
Just change the timer as follow taking off one wire on the old timer and connect to the new one, and do the same thing for all of the wires.This way will be not confuse with the connections.
  • JAIRO from DELAND, FL
  • Difficulty Level:
    Really Easy
  • Total Repair Time:
    15 - 30 mins
  • Tools:
    Nutdriver, Screw drivers
4 of 5 people found this instruction helpful.
Was this instruction helpful to you?
Thank you for voting!
dryer wouldn't stay running when "start"
Removed nuts from back cover. removed old assembly from the dryer. screwed the new one to the dryer. Pulled wires from the old assembly and replaced them onto the new one (one at a time to assure proper location). Put the cover back on...Plugged the dryer in and whala! I wouldn't have imagined that I could have fixed it myself, but It was easy!
  • Jennifer from Aaronsburg, PA
  • Difficulty Level:
    Really Easy
  • Total Repair Time:
    15 - 30 mins
  • Tools:
    Nutdriver, Pliers
1 of 3 people found this instruction helpful.
Was this instruction helpful to you?
Thank you for voting!
Timer didn't move the dial while drying
Unplug the power cord. Next I removed the 6 screws that held the top back panel in place. Then pull the dial off the timer post. Then unscrew the 2 screws holding the timer in place. At this point it would have been "really easy" to swap the wires from the old timer to the new timer, except the wires that slid onto the posts also had a piece that locked them into place. I had to rig a paper clip with a small bend at the end to poke into the hole to release the small metal piece that locked it into place before sliding off the wire. Some were a bit difficult to reach because of the angle of the wire post and what was next to it on the timer. All in all though this phase took less than 15 minutes, so it wasn't too bad. After swapping the wires from the old timer to the new timer, reverse the disassembly procedures to put everything back in place. The new timer works better than my old one before it broke, ensuring my clothes are actually dry when setting it on the sensor-dry setting. And it actually does what it's supposed to when finished drying - that is activate the buzzer, and tumble the clothes every 5 minutes or so to prevent wrinkling.
  • Michael P from Flagstaff, AZ
  • Difficulty Level:
    Easy
  • Total Repair Time:
    15 - 30 mins
  • Tools:
    Socket set
13 of 15 people found this instruction helpful.
Was this instruction helpful to you?
Thank you for voting!
Dryer had to be manually shut off.
Removed cover, removed each wire tab from the old timer, placed it in the same spot on the new one, put the cover back on.
  • Patsy from Sulphur Springs, TX
  • Difficulty Level:
    Really Easy
  • Total Repair Time:
    Less than 15 mins
  • Tools:
    Screw drivers
3 of 4 people found this instruction helpful.
Was this instruction helpful to you?
Thank you for voting!
  • 1
  • 2
Questions and Answers

Ask our experts a question about this part and we'll get back to you as soon as possible!

3 questions answered by our experts.
Sort by:
  • 1
Sorry, we couldn't find any existing answers that matched.Try using some different or simpler keywords, or submit your new question by using the "Ask a Question" button above!
Morris
October 30, 2019
Dryer comes on with heat but cuts off in a few minutes, try again and it does the same thing. You think the timer is bad?
PartSelect logo
Hello Morris, thank you for inquiring. The issue may be with the Timer, but you will also want to consider the Moisture Sensor. We will need the model number for your dryer to locate the compatible replacement parts for it. We look forward to hearing back from you!

1 person found this helpful.

Was this helpful?
Thank you for voting!
Delia
November 9, 2019
I have checked all parts and had them tested for my KitchenAid dryer. I took the heating element; dryer thermal fuse; thermal cut off kit; dryer cycling thermostat; thermostat high limit so what else can be wrong with the dryer, either the 220/240 plug or the timer. Does the timer have anything to do with the heat. The dryer is not heating.
For model number KEYS750LQ0
PartSelect logo
Hello Delia, thank you for your question. The only other part that could be the issue is the temperature selector switch. I would recommend testing the switch and if that part is fine, the timer should be replaced. I hope this helps.

Was this helpful?
Thank you for voting!
Don
April 1, 2018
The dryer comes on but there is no heat. Can you help?
For model number KEYS850GQ0
PartSelect logo
Hello Don, Thanks for your question. There are a few different parts you may wish to test with a multimeter for electrical continuity. Test the thermal cut-off kit, the internal-bias thermostat, the heating element connection wire kit, the thermal fuse, and the heating element. You may also want to examine the belt for any signs of wear and tear. I hope this helps.

Was this helpful?
Thank you for voting!
Related Parts:
  • 1
Model Cross Reference
This part works with the following models:
PartSelect Number: PS11742163
Manufacturer Part Number: WP3976570
Brand
Model Number
Description
Whirlpool
GEC9858EQ0
Dryer - Residential
Whirlpool
GEC9858EQ1
Dryer - Residential, Electric
Whirlpool
GEC9858EZ0
Dryer - Residential
Whirlpool
GEC9858EZ1
Dryer - Residential, Electric
Whirlpool
GEQ8858EQ0
Dryer - Residential, Electric
Whirlpool
GEQ8858EZ0
Dryer - Residential, Electric
Whirlpool
GGC9858EQ0
Dryer - Residential
Whirlpool
GGC9858EQ1
Dryer - Residential, Gas
Whirlpool
GGC9858EZ0
Dryer - Residential
Whirlpool
GGC9858EZ1
Dryer - Residential, Gas
Whirlpool
GGQ8858EQ0
Dryer - Residential, Gas
Whirlpool
GGQ8858EQ1
Dryer - Residential, Gas
Whirlpool
GGQ8858EZ0
Dryer - Residential, Gas
Whirlpool
GGQ8858EZ1
Dryer - Residential, Gas
KitchenAid
JG4ST700GQ0
Dryer - GAS DRYER
KitchenAid
JG4ST700GZ0
Dryer - GAS DRYER
KitchenAid
KEYS700GQ0
Dryer
KitchenAid
KEYS700GT0
Dryer
KitchenAid
KEYS700GZ0
Dryer
KitchenAid
KEYS700JQ0
Dryer
KitchenAid
KEYS700JQ1
Dryer
KitchenAid
KEYS700JT0
Dryer
KitchenAid
KEYS700JT1
Dryer
KitchenAid
KEYS700LQ0
Dryer
KitchenAid
KEYS700LQ1
Dryer
KitchenAid
KEYS700LT0
Dryer
KitchenAid
KEYS700LT1
Dryer
KitchenAid
KEYS710JQ0
Dryer
KitchenAid
KEYS710JQ1
Dryer
KitchenAid
KEYS710LQ0
Dryer
Customer Service Representative

Get in touch, we're here to help!

Daily 8am - 9pm EST

Contact Customer Service