Parts That Fix Maytag Dryer MDE7400AYW Marks left on clothes
Marks left on clothes is a commonly reported symptom for the MDE7400AYW Maytag Dryer, and we have put together a full guide on how to fix this. This advice is based on feedback from people who own this exact appliance. We have listed the most common parts for your MDE7400AYW Maytag Dryer that will fix Marks left on clothes. We have included repair instructions, and helpful step-by-step video tutorials. If you are experiencing this issue, not to worry, DIYers just like you have fixed this, and shared their experience to help you!
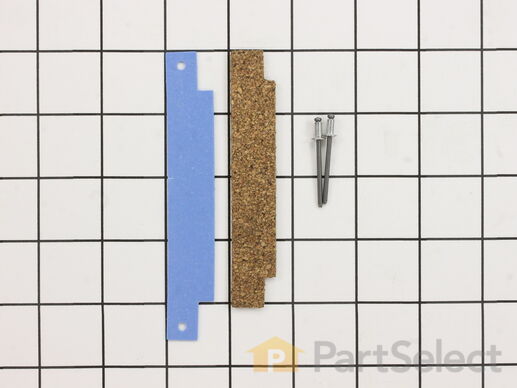
The front glide is located at the front of the dryer, the drum rides along it. If you hear a metal-on-metal noise when your dryer is running, your front glide may be worn out and require replacing. This front glide kit comes with a blue plastic glide, a brown cork pad, and two metallic rivets. Two kits are required per appliance. While you have the front bulkhead removed for this repair, you may want to inspect the felt that lines it. If the felt is damaged, it is recommended that you replace it at the same time. You will need a rivet tool for this installation, as well as a stubby Phillips screwdriver, a 5/16 nut driver, and a drill with a 1/8-inch bit.
Replacing your Maytag Dryer Front Glide Kit

Customer Repair Stories
My dryer - which is about 20 years old - was starting to make some rubbing/scraping sounds from the drum area.
1. Removed the two screws at the front bottom that are holding on the fromt panel, and then lift up and remove the panel.
2. Disconnect the door-open-safety-switch, remembering which color of wire goes on which connection.
3. Remove the four s ... Read more crews (two on each side) on the front bracket that supports the drum and tthat contains the front glides.
4. Remove support bracket and lint trap, letting the drum rest gently on the stuff underneath.
5. Remove the screws holding the lint trap to the support bracket. (My model had five screws.) Remove lint trap from support bracket.
6. Drill out the two pop rivets on each of the two glides, noting the orientation of the teflon pad and mounting strip.
7. Secure - and here is where I had a little problem - new glides in place with pop rivets. (I hadn't use a rivet gun in a while, so I messed up the first pop rivet and had to go to the hardware store to get a replacement. I didn't hold the pop rivet in all the way while I was accuating the gun!)
8. Reverse the process for assembly, and you are all done.
It's simple.
-
Richard from Loretto, MN
-
Difficulty Level:Really Easy
-
Total Repair Time:1- 2 hours
-
Tools:Nutdriver, Screw drivers
Noisy and thumping drum
-
Barry from League City, TX
-
Difficulty Level:Really Easy
-
Total Repair Time:1- 2 hours
-
Tools:Nutdriver, Screw drivers
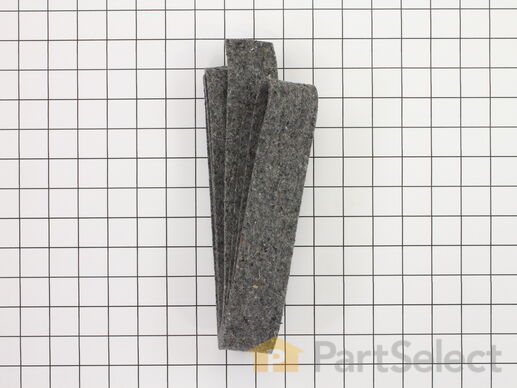
This is a drum felt seal for your dryer. It creates an airtight seal between the dryer rear panel and the back of the drum. It is important that this seal be flexible so it does not interfere with the function of the appliance. This model may be used for the front or the rear of your appliance. Take note that the adhesive is not included. The most common reason for needing to repair this part is if your dryer will not tumble, or there is not enough heat to properly dry your clothing.
Replacing your Maytag Dryer Dryer Drum Felt Seal

Customer Repair Stories
Drum seal coming apart
-
Kirt from TWIN FALLS, ID
-
Difficulty Level:Really Easy
-
Total Repair Time:30 - 60 mins
-
Tools:Nutdriver, Screw drivers
Rear Felt seal came out, squealing sound when drying
1) Removed bottom front panel
2) lifted top panel up like a car hood
3) Removed door springs
4) disconnected electrial connections to door unit, removed door unit
5) removed drum, scraped old felt from drum
6) glued new felt with a very strong glue (nanoglue or gorilla glue, ... Read more same thing), let it dry overnight
7) secured back inside panel, replaced drum and put dryer back together.
-
Matthew from Lombard, IL
-
Difficulty Level:Easy
-
Total Repair Time:1- 2 hours
-
Tools:Screw drivers
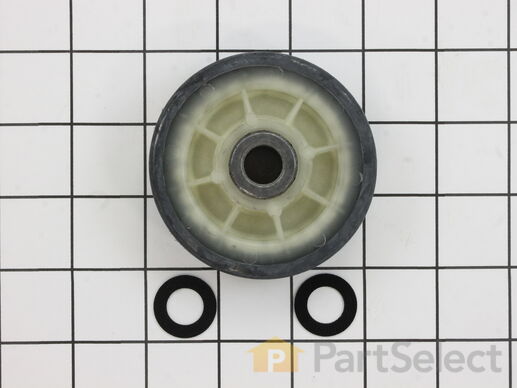
The drum support roller (Dryer Drum Support Roller, Drum Roller and Washer Assembly) holds the drum in the proper position while it spins on the support wheels. This part rotates on the roller shaft which is attached to the rear bulkhead. This part should be replaced whenever it does not rotate easily on the roller shaft. If you’re noticing a thump, scrape, or squeal while your drum is spinning, it may be your drum support rollers. Take a look at your existing drum rollers; if one or both of them are worn or broken, you’ll need to replace them. The drum support roller is subject to constant wearing when your dryer is in use, which causes them to break down over time. This part features 1 roller and 2 small washers, and measures approximately 3 inches in diameter. It is constructed with a combination of plastic, metal and rubber. This model comes in black/beige.
Replacing your Maytag Dryer Drum Support Roller Kit

Customer Repair Stories
noisy
-
Hazel from CONNERSVILLE, IN
-
Difficulty Level:A Bit Difficult
-
Total Repair Time:More than 2 hours
-
Tools:Nutdriver, Screw drivers, Socket set
Dryer was making awful noise during use
-
Pam from Aberdeen, WA
-
Difficulty Level:A Bit Difficult
-
Total Repair Time:1- 2 hours
-
Tools:Screw drivers


