Models > MAH6700AWW > Symptoms > Will not drain

Parts That Fix Maytag Washer MAH6700AWW Will not drain

Will not drain is a commonly reported symptom for the MAH6700AWW Maytag Washer, and we have put together a full guide on how to fix this. This advice is based on feedback from people who own this exact appliance. We have listed the most common parts for your MAH6700AWW Maytag Washer that will fix Will not drain. We have included repair instructions, and helpful step-by-step video tutorials. If you are experiencing this issue, not to worry, DIYers just like you have fixed this, and shared their experience to help you!

Fixes Symptom 91% of time
★★★★★
★★★★★
13 Reviews

Rated by 9 customers 


Easy 

30 - 60 mins 

Ratings submitted by customers like you who bought this part.   

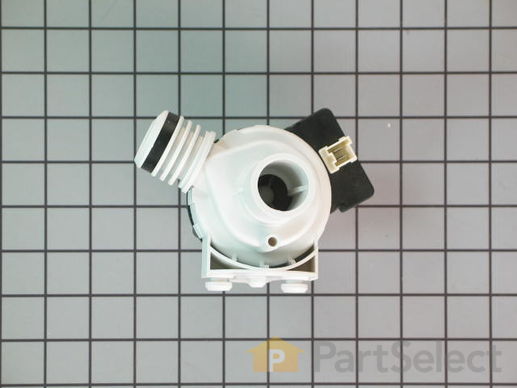
This pump helps expel water from the washing machine and is activated after the spin speed is maintained for a specific period of time. NOTE: Pump only, mounting bracket is NOT included.

$ 164.24
  In Stock
PartSelect Number PS11741568
Manufacturer Part Number WP34001340

Replacing your Maytag Washer Drain Pump - 120V 60Hz

Replacing your Drain Pump - 120V 60Hz

Customer Repair Stories

Water will not drain properly. This not only left the clothes very wet it also made the cycle take longer.

First thing I did was to unplug the washer's power cord from wall outlet. Secondly I disconnected the hot and cold water hoses. You need to have a pan or bucket handy to catch any water once hoses are disconnected. Thirdly I removed the screws that secures the rear panel and removed panel to expose the pump at the bottom of the washer. I then disconnected the power cable going to the pump and removed the inlet and outlet hoses connected to the pump. You may need a set of pliers to remove the hose clamps if you don't have strong fingers. Note! you will need some rags or towels to soak up the water when you remove the drain hose that goes from the washer's tub to the pump inlet once the hose is disconnect. Once this is completed, I finally removed the 3 screws that secured the pump to the washer's frame and removed the faulty pump. Once pump is removed reinstall new pump in reverse. If you are handy with a screw driver and pliers this is an easy fix. Once pump was replaced the washer ran and drained fine. To avoid future damages to your pump always check clothes pockets for foreign objects prior to washing. The damage to my pump was caused by a quarter that got in the drain hose and damaged the pump's impeller. Be real careful not to cut yourself, because there are a few sharp edges on the washer's panel and frame when removing the pump. I hope my experience helps someone who may encounter the same problem.
  • Julian from Killeen, TX
  • Difficulty Level:
    Really Easy
  • Total Repair Time:
    15 - 30 mins
  • Tools:
    Pliers, Screw drivers
58 of 63 people found this instruction helpful.
Was this instruction helpful to you?
Thank you for voting!

Coins had been pulled into the pump, breaking blades and cracked casing.

First I unplugged the washer and removed the back cover plate of the washer. I drained the pump and drainage lines. I then removed the two hose clamps and removed the connecting hoses. I removed the electrical connection. I loosened the three mounting bolts holding the mounting plate holding the pump. Once out, I could remove the pump from the plate and replaced it with the new part. I remounted the mounting plate, attached the hoses and clamps. I reattached the electrical connection and the back plate to the washer.


The Maytag is well designed and the parts are easy to reach. At least from this experience, the machine was designed with efficient repairs in mind. This is a sign of a well made machine.
  • Robert from El Paso, TX
  • Difficulty Level:
    Easy
  • Total Repair Time:
    30 - 60 mins
  • Tools:
    Pliers, Socket set, Wrench set
144 of 161 people found this instruction helpful.
Was this instruction helpful to you?
Thank you for voting!
Fixes Symptom 7% of time
★★★★★
★★★★★
1 Review

Rated by 1 customer 


Really Easy 

15 - 30 mins 

Ratings submitted by customers like you who bought this part.   

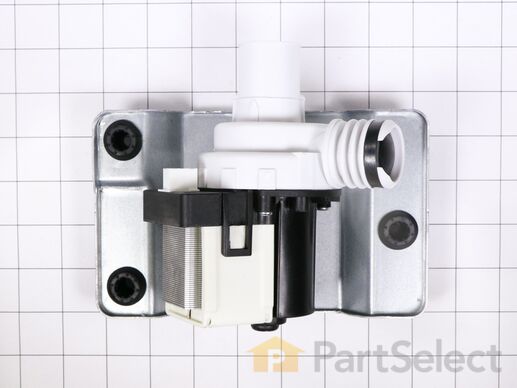
This pump helps expel water from the washing machine and is activated after the spin speed is maintained for a specific period of time.

$ 376.72
  In Stock
PartSelect Number PS11741564
Manufacturer Part Number WP34001320

Customer Repair Stories

A small coin had entered the impeller and the blades ground off against it.

The rear access is attached with 2 Phillips head screws, which I removed.
The drain hose is held up with a similar screw.
I removed the screw and drained the hose into a bucket.
Then I just removed the connector and hoses with my fingers, removed the three 1/2" bolts holding the pump in place, changed the pump and put everything back together. Works like a champ. Quick and easy fix.
My only negative comment is that I only needed the impeller, but had to buy the complete pump assembly. Other than that, all fine.
  • CHARLES from MAGNOLIA, TX
  • Difficulty Level:
    Really Easy
  • Total Repair Time:
    15 - 30 mins
  • Tools:
    Screw drivers, Wrench set
46 of 56 people found this instruction helpful.
Was this instruction helpful to you?
Thank you for voting!
Fixes Symptom 2% of time

Rated by 1 customer 


A Bit Difficult 

Less than 15 mins 
Ratings submitted by customers like you who bought this part.   

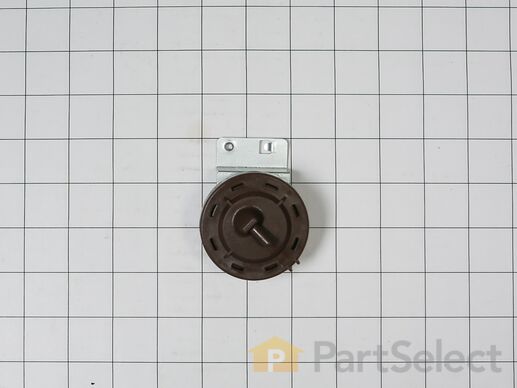
This part senses how much water is in the tub and allows it to reach the desired level. For example: A little water equals little pressure and a lot of water means more pressure inside the switch.

  No Longer Available
PartSelect Number PS11741566
Manufacturer Part Number WP34001324

Customer Repair Stories

drain pump runs continuously

Checked owners manual for diagnostics. Pointed to door lock mechanism, so we replaced. didnt work. Went online to Just Answers.com, chatted with pro named Mike(for the fee of $25) and without getting full description, he told me to replace pressure sensor. Bought one here for $50, replaced it, and still the problem lingered. Called a real Technician to the house, for $90, and he spent 4 minutes looking and tapping, and voilla, it worked. Turns out it was a stuck relay on the control board, and the tapping loosened it. He told me I may have trouble with it in the future. If so, I would buy one here. Thanks
  • Joe from Greenfield, MA
  • Difficulty Level:
    A Bit Difficult
  • Total Repair Time:
    15 - 30 mins
  • Tools:
    Screw drivers
Was this instruction helpful to you?
Thank you for voting!

OE error. All i read indicated the need for new sensor, but it did not correct the problem.

My husband simply removed the old sensor and put the new one in. It was not difficult.
  • LISA from PRINCETON, WV
  • Difficulty Level:
    A Bit Difficult
  • Total Repair Time:
    Less than 15 mins
8 of 30 people found this instruction helpful.
Was this instruction helpful to you?
Thank you for voting!