Models > C2S980SEM1SS > Symptoms > Element will not heat

Parts That Fix General Electric Range C2S980SEM1SS Element will not heat

Element will not heat is a commonly reported symptom for the C2S980SEM1SS General Electric Range, and we have put together a full guide on how to fix this. This advice is based on feedback from people who own this exact appliance. We have listed the most common parts for your C2S980SEM1SS General Electric Range that will fix Element will not heat. We have included repair instructions, and helpful step-by-step video tutorials. If you are experiencing this issue, not to worry, DIYers just like you have fixed this, and shared their experience to help you!

Fixes Symptom 80% of time
★★★★★
★★★★★
91 Reviews

Rated by 36 customers 


Really Easy 

15 - 30 mins 

Ratings submitted by customers like you who bought this part.   

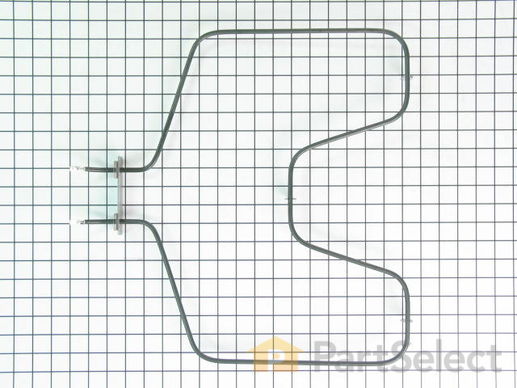
The bake element is located on the bottom of the oven. If your oven will not heat properly it may be due to a faulty or damaged baking element. If you can see that the element has been separated or blistered, you should replace the part immediately. If there is no visible damage, turn the oven on and check to see if the element heats evenly. If the element is not heating evenly, or if it is not heating at all, it will need to be replaced. This element is 19 inches wide x 19 inches long, and has male spade push on terminals.

$ 122.85
  In Stock
PartSelect Number PS249238
Manufacturer Part Number WB44K10005

Replacing your General Electric Range Bake Element - Push On Terminals - 240V

Replacing your Bake Element - Push On Terminals - 240V

Customer Repair Stories

Broken heating element

1)Turn off power to stove
2)remove 2 bolts holding heating element
3)pull element out of the back of the oven about 8" so that the wire connects is visable
4)pull wire clips off of heating element and remove element from the oven
5)put wire clips on the new heating element
6)push new heating element back into the holes in the back of the oven
7)screw botls back into the oven holding the heating element in place
8)Turn power back on
  • Paul from anna, TX
  • Difficulty Level:
    Really Easy
  • Total Repair Time:
    15 - 30 mins
  • Tools:
    Nutdriver, Pliers
73 of 85 people found this instruction helpful.
Was this instruction helpful to you?
Thank you for voting!

Lower bake Element would not heat.

First I slid the stove out and unpluged it, then removed two screws,slid out element, disconected two wires, slid new element in to place, pluged two wires in ,put into place and installed two screws, pluged stove back in, and turned on to try. Works perfect.
  • Ronald from Nassau, NY
  • Difficulty Level:
    Really Easy
  • Total Repair Time:
    Less than 15 mins
  • Tools:
    Nutdriver, Pliers
221 of 244 people found this instruction helpful.
Was this instruction helpful to you?
Thank you for voting!
Fixes Symptom 17% of time
★★★★★
★★★★★
8 Reviews

Rated by 11 customers 


Easy 

30 - 60 mins 

Ratings submitted by customers like you who bought this part.   

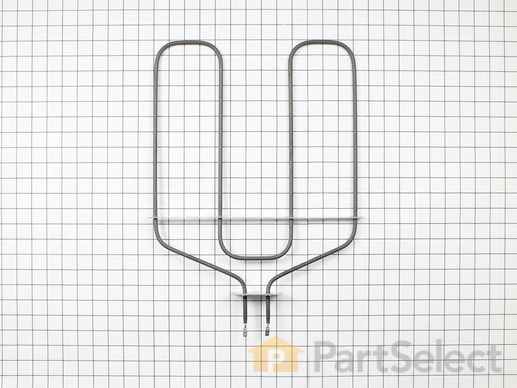
This broil element is found on the roof of the oven.

$ 104.66
  In Stock
PartSelect Number PS249236
Manufacturer Part Number WB44K10002

Replacing your General Electric Range Broil Element - 240V

Replacing your Broil Element - 240V

Customer Repair Stories

Broiler element was burned out

After turning the power off to the range, it was as simple as removing the screws for the broiler itself and the bracket and plugging in the new element. Yes, it was that easy.
  • Ursula from Suffolk, VA
  • Difficulty Level:
    Really Easy
  • Total Repair Time:
    Less than 15 mins
  • Tools:
    Nutdriver
11 of 11 people found this instruction helpful.
Was this instruction helpful to you?
Thank you for voting!

Broiler burnt out.

Removed screws using nut driver. Pulled element way forward until wires came through. Pondered how to detach burned out element from wires. Chickened out, call neighbor who grasped things firmly with two hands and pulled. Old element came loose. Popped in new element. Cursed the screws that wouldn't align with holes to support element; finally did it. Screwed element plate in place. Put oven door back on, plugged it in and turned it on hoping that we hadn't reversed the wires. Job accomplished.
  • ellen from centennial, CO
  • Difficulty Level:
    Easy
  • Total Repair Time:
    15 - 30 mins
  • Tools:
    Nutdriver
20 of 24 people found this instruction helpful.
Was this instruction helpful to you?
Thank you for voting!
Fixes Symptom 2% of time
★★★★★
★★★★★
10 Reviews

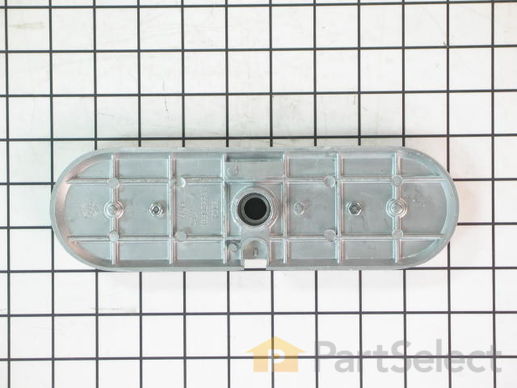
This also comes with Spark Electrode.

  No Longer Available
PartSelect Number PS1018858
Manufacturer Part Number WB16K10053
Fixes Symptom 1% of time
★★★★★
★★★★★
13 Reviews

Rated by 3 customers 


Easy 

15 - 30 mins 

Ratings submitted by customers like you who bought this part.   

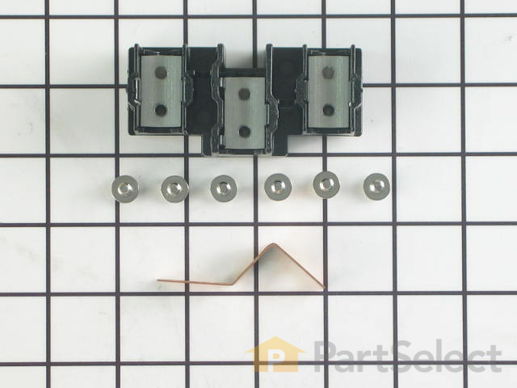
This part provides a way of connecting individual electrical wires and offers protection of the device from electrical surges (voltages and/or currents).

$ 56.72
  In Stock
PartSelect Number PS953027
Manufacturer Part Number WB17T10011

Customer Repair Stories

Original terminal block plastic shielding melted, protecting appliance when the wires overheated.

Safety first * Unplugged 220 VAC from outlet. Removed shield cover screws with 1/4" hex nut driver (5 screws). Removed all 6 silver screws from terminal block with 1/4" nut driver, freeing all wires. Removed the green ground screw and ground bracket from center terminal. Cut away (using the drill) melted original terminal block plastic to access the 2 black 1/4" nuts holding original terminal block onto appliance. Discarded the original damaged terminal block. Attached the new terminal block, aligning the mounting holes and the terminal block the same way the original terminal block was lined up and re-used the black 1/4" nuts (original used because the replacement package did not include new black screws). I bought a new appliance cord, since the original cord overheated. Reattached all wires using the 6 new silver screws. Start with the middle terminal by attaching the appliance wires and the ground bracket. The ground must be attached to the bracket and the bracket bridges between the terminal block and the range body. Reattached shield cover. Plugged in appliance. Note: it doesn't matter which outside wire attaches to the outside terminals (both are hot), but the middle wire (neutral) must attach to the middle terminal. However, the ring terminal should be flush on the terminal block so you don't bend the ring.
  • Brian from DOVER, PA
  • Difficulty Level:
    Really Easy
  • Total Repair Time:
    30 - 60 mins
  • Tools:
    Nutdriver
5 of 7 people found this instruction helpful.
Was this instruction helpful to you?
Thank you for voting!

terminal block melted

The existing terminal block on my Ge oven/Range had melted due to a loose wire causing sparking and starting the plastic casing of the terminal block on fire and melting it, Part select made the part easy to find and had it at my house in 2 days. All I had to do was remove six screws to take the back sheet metal cover off of the oven. Unscrew the terminal connections remove two mounting screws that held the terminal on to the oven body. This was a little trickier than it should have been because the melted plastic had reformed making it very hard to access the mounting screws. i then mounted the new piece and plugged the oven in, it took 15 minutes and was very easy. definitely saved me at-least a $100 for the service call i would have made if finding the part wasn't so convenient
  • jonathan from willow springs, IL
  • Difficulty Level:
    Easy
  • Total Repair Time:
    Less than 15 mins
  • Tools:
    Nutdriver, Screw drivers
53 of 67 people found this instruction helpful.
Was this instruction helpful to you?
Thank you for voting!