


Models
>
RMD357
RMD357 Caloric Range - Overview
Sections of the RMD357
[Viewing 6 of 6]


Keep searches simple, eg. "belt" or "pump".

Light Bulb - 40W
PartSelect #: PS884734
Manufacturer #: 8009
This an authentic OEM 40-Watt replacement light bulb, used in a number of household appliances. It is specially designed to withstand extreme temperatures, which is why these replacement bulbs are mos...
$11.73
In Stock

Oven Thermostat Knob
PartSelect #: PS11757498
Manufacturer #: WPY07506601
This black oven thermostat knob is just over two inches in diameter. It has a chrome trim around the perimeter of the knob and white lettering denoting the various temperature within the oven.
$46.74
In Stock

Suface Burner Ignition Switch
PartSelect #: PS11742283
Manufacturer #: WP4157180
When the gas burner valve knob is depressed and turned, this part creates a spark that lights the gas and starts the burner.
$65.30
In Stock

Oven Sides Seal
PartSelect #: PS2197443
Manufacturer #: Y07623603
It is made of black rubber and has a metal hook in each end.
No Longer Available

Oven Seal - Top or Bottom
PartSelect #: PS1757448
Manufacturer #: Y07623602
This piece of oven door seal has a metal hook on each end. This seal is compatible with the top and the bottom of the oven door window.
No Longer Available

Surface Burner Knob
PartSelect #: PS1757338
Manufacturer #: Y07507301
This black surface burner knob has a chrome trim around the perimeter of the knob and white lettering denoting the off, light, and high positions. This knob is used with gas ranges and cooktops. Sold individually.
No Longer Available

Top Burner Spark Igniter
PartSelect #: PS1757313
Manufacturer #: Y07491203
Also known as a spark electrode.
No Longer Available

Bake or Broil Spark Igniter
PartSelect #: PS1757316
Manufacturer #: Y07491300
Also known as spark electrode. This part helps your burner ignite and produce flame.
No Longer Available

Spark Module
PartSelect #: PS2033659
Manufacturer #: 31829401
The color of the original part or the part you receive may be different from the pictured part. This is still the correct part.
No Longer Available


Questions And Answers for RMD357
We're sorry, but our Q&A experts are temporarily unavailable.
Please check back later if you still haven't found the answer you need.
Common Symptoms of the RMD357
[Viewing 1 of 1]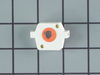

Keep searches simple. Use keywords, e.g. "leaking", "pump", "broken" or "fit".
Oven seals got dried and cracked
The top seal was too long (my fault, ordered wrong length seal) so I had to cut it and high-temp epoxy the metal hook into the end. Overall pretty easy fix.
Parts Used:


-
Brent from Goleta, CA
-
Difficulty Level:Easy
-
Total Repair Time:Less than 15 mins
21 of 30 people
found this instruction helpful.
Was this instruction helpful to you?
Thank you for voting!
electric ignite gas stove kept clicking the ignitor unless unplugged from electrical outlet
I removed the 2 screws that held the housing on at the back of the stove. Then I removed the 2 screws that held the module to the back of the stove. Since I am not an experienced electrical person (I am a female nurse in the operating room), I unplugged 1 wire at a time from the old module and plugged it into the new module. I repeated th
... Read more
is step with each wire to make sure I didn't put the wrong wire on a wrong spot until I had all the wires to the new module. Then reattached the screws, plugged in the oven and presto, it works just fine! Was amazed at how easy it was. A 50 dollar part instead of a new 1500 dollar stove. How easy is that?
Read less
Parts Used:

-
Diana from Jacksonville, FL
-
Difficulty Level:Really Easy
-
Total Repair Time:Less than 15 mins
-
Tools:Screw drivers
10 of 11 people
found this instruction helpful.
Was this instruction helpful to you?
Thank you for voting!
Ignitor did not spark when turning the know
Had to remove the 4 range knobs, and the oven knob and then the facie. Two screws under the end caps and two on each side from the back on each end. Design defect: one of these screws which attaches through the frame to the facie also attaches the support which holds up the range top. Take that one off last. Remove the two wires that atta
... Read more
ch to the oven light switch. After detaching the power supply to the defective ignition unit, it just pulls right off. Push the new switch on over the knob shaft and reassemble.
Read less
Parts Used:

-
Richard from Lansing, MI
-
Difficulty Level:Easy
-
Total Repair Time:15 - 30 mins
-
Tools:Screw drivers
9 of 11 people
found this instruction helpful.
Was this instruction helpful to you?
Thank you for voting!