


Models
>
MMV4184AAW
MMV4184AAW Maytag Microwave - Overview
Sections of the MMV4184AAW
[Viewing 7 of 7]


.gif "SUPPLEMENTAL INFORMATION Diagram and Parts List for Maytag Microwave")

Keep searches simple, eg. "belt" or "pump".

Light Bulb - 40W
PartSelect #: PS2376034
Manufacturer #: 8206232A
This 40w light bulb is a replacement bulb constructed of glass and metal. It is an easy-to-install electrical part which produces 40w of light. If the bulb won't light up then it may be broken and sho...
$8.87
In Stock

Light Bulb - 120V 25W
PartSelect #: PS11747806
Manufacturer #: WPA3073101
This light bulb is a 120 volt, 25 watt incandescent appliance light bulb with a small base screw-in that fits in a variety of appliances such as microwaves, refrigerators, freezers, cooktops, or stove...
$17.11
In Stock

Fastener Screw
PartSelect #: PS389896
Manufacturer #: 8169475
Sold individually.
No Longer Available

Cooking Tray
PartSelect #: PS2166201
Manufacturer #: R0130603
This tray rotates in your microwave ensuring more even temperatures.
No Longer Available

Light Cover - Clear
PartSelect #: PS2166212
Manufacturer #: R0130614
Note: As per the manufacture the original cover was made with one hole, the part is now made with three holes.
No Longer Available

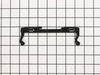
Grease Filter
PartSelect #: PS11747942
Manufacturer #: WPR0130608
This part is the replacement grease filter for your microwave. It is metallic in color and is approximately 15 inches wide and 8 inches deep. The grease filter is found on the bottom of your microwave...
$38.43
In Stock

Circular Turntable Support with Wheels
PartSelect #: PS11750386
Manufacturer #: WPW10207752
This roller guide sits underneath the glass turntable tray.
$29.19
In Stock

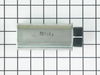
Charcoal Filter
PartSelect #: PS11747949
Manufacturer #: WPR0131462
This is the replacement charcoal filter for your microwave. It is silver and black in color and measures approximately 11 inches by 2 ½ inches. The charcoal filter removes cooking odors from the air ...
$28.12
In Stock

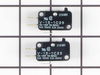
Door Interlock Switch Kit
PartSelect #: PS373050
Manufacturer #: 4392027
This part is a genuine manufacturer door interlock switch kit, also known as primary micro switch or microwave switch kit, for a microwave. The function of this part is to sense when the door of the m...
$85.78
In Stock


Single Shelf Holder
PartSelect #: PS11747958
Manufacturer #: WPR9800384
This support stud is sold individually. It is used to hold up wire shelves in refrigerators.
No Longer Available

Wave Guide Rivet
PartSelect #: PS11742425
Manufacturer #: WP4359508
This rivet is used for the stirrer cover/wave guide. They are sold individually.
$8.25
In Stock
Questions And Answers for MMV4184AAW
We're sorry, but our Q&A experts are temporarily unavailable.
Please check back later if you still haven't found the answer you need.
Sort by:
- < Prev
- 1
- Next >
Search filter:
Clear Filter
Your search term must have 3 or more characters.
Keep searches simple. Use keywords, e.g. "leaking", "pump", "broken" or "fit".
Sorry, we couldn't find any existing answers that matched.Try using some different or simpler keywords, or submit your new question by using the "Ask a Question" button above!
Steven
February 24, 2022
Can the door and the upper vent cover be removed for cleaning?
For model number MMV4184AAW
Hello Steven, thank you for writing. Locate and remove the screws with a screwdriver and set them aside in a small container. Pull the grill away from the microwave. Reverse process to put the grill back in place. The Door should just pop off the hinges. Good luck and have a great day.
Was this helpful?
Thank you for voting!
Carl
February 28, 2023
How can I remove the door to replace the handle
For model number MMV4184AAW
Hi Carl, thank you for contacting us. Follow these instructions to remove the door:
1. Disconnect the power to the oven.
2. Remove screws located on the front of the top of the microwave securing the grille.
3- Pull outward on the top portion of the grille releasing the tabs.
4- Open the oven door, and slowly raise the door evenly.
5- Disengaging the pins at the top and bottom. We hope this information helps!
Was this helpful?
Thank you for voting!
- < Prev
- 1
- Next >
Common Symptoms of the MMV4184AAW
[Viewing 5 of 5]Won’t turn on
Fixed by
these parts
these parts
Show All
Tray won’t turn
Fixed by
these parts
these parts

Show All
Doesn’t shut off
Fixed by
these parts
these parts
Show All
Door not closing properly
Fixed by
these parts
these parts
Show All
No heat
Fixed by
these parts
these parts
Show All


Keep searches simple. Use keywords, e.g. "leaking", "pump", "broken" or "fit".
light bult needed to be replaced
The nightmare was that this microwave is installed under the cabinet....in order to get to the light bulb I had to pull out my stove then squeeze into the space between the stove and counter....my old microwave light bult was much easier to change.....Shame on Whirlpool for making this so difficult.....must be a better way to cover the li
... Read more
ght bulb so that we do not need a screwdriver to remove the door to get to the light bulb
Read less
Parts Used:

-
Deborah from Millersville, MD
-
Difficulty Level:Difficult
-
Total Repair Time:Less than 15 mins
-
Tools:Screw drivers
200 of 292 people
found this instruction helpful.
Was this instruction helpful to you?
Thank you for voting!
Bulb "burnt out"
Removed 1 screw, removed "burnt out" bulb and replaced it with new bulb.
Parts Used:
-
Joseph from Pembroke, MA
-
Difficulty Level:Really Easy
-
Total Repair Time:Less than 15 mins
-
Tools:Screw drivers
92 of 144 people
found this instruction helpful.
Was this instruction helpful to you?
Thank you for voting!
Microwave worked intermittently depending on how door was closed
Remove top grille (2 screws), undo control panel (1 screw). Tilt down control panel, switches are on the left. There are actually three switches that are involved with the door, two horizontally mounted, one vertically mounted. This would be an EASY REPAIR, but it took me a while to figure out which of the three switches was bad, and a
... Read more
lso took a while to figure out that there is a plastic rod that inserts through the hole in the switch body. Once i figured this out went like a breeze. Lower horizontal switch was the bad one, but since the kit came with two switches i went ahead and replaced the upper horizontal one as well. IT appears that the horizontal switches are probably more likely to fail than the vertical switch based on the position of the switch and force angles. Works great now!
Read less
Parts Used:

-
Robert from Bainbridge Island, WA
-
Difficulty Level:A Bit Difficult
-
Total Repair Time:30 - 60 mins
-
Tools:Pliers, Screw drivers
67 of 82 people
found this instruction helpful.
Was this instruction helpful to you?
Thank you for voting!