


Models
>
KECC567KBT0
KECC567KBT0 KitchenAid Cooktop - Overview
Models starting with KECC567KBT0
Click on the best match to narrow your results.
Keep searches simple, eg. "belt" or "pump".

Surface Burner Knob
PartSelect #: PS11747113
Manufacturer #: WP9750372FF
This knob allows you to turn the burner on your range or cooktop on, and it allows you to control the temperature of the burner. If your knob is broken, damaged, or lost, this is the replacement part ...
$24.11
In Stock

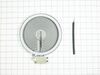
Dual Surface Element - 2500w/1200w
PartSelect #: PS11764902
Manufacturer #: W10823692
This is the replacement large surface element for your cooktop or range. It is approximately 10-inches in diameter and is 1200/2500 watts. The large surface element is installed under the cooktop and ...
$229.84
In Stock

Cooktop Cleaner
PartSelect #: PS3492527
Manufacturer #: W10355051
This bottle of non-abrasive cooktop cleaner breaks down and gets rid of the hardest baked-on stains and residue without causing any harm to your appliance. The bottle is 10 oz and does not require a l...
$17.76
In Stock

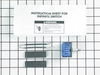
Surface Element Switch Kit
PartSelect #: PS972602
Manufacturer #: 8203534
This switch controls the stove top surface burner.
$121.26
In Stock

Radiant Surface Burner Element 1500W
PartSelect #: PS11764909
Manufacturer #: W10823699
This surface element is made for under glass set-ups and supplies the heat to a cooking area on top of the range. It has an outside diameter of approximately 7 inches (1500 watts), and is a genuine OE...
$106.72
In Stock

Burner Knob
PartSelect #: PS11747112
Manufacturer #: WP9750372FC
Sold individually. This bisque knob accepts a double-flat shaft.
$11.10
In Stock

Burner Knob
PartSelect #: PS11747114
Manufacturer #: WP9750372FW
Sold individually. This knob accepts a double-flat shaft.
$18.30
In Stock

6 Inch Surface Element Infinite Switch
PartSelect #: PS11740892
Manufacturer #: WP3191049
This switch controls the stove top surface burner.
$89.63
In Stock


Dual Burner Control Switch
PartSelect #: PS11742653
Manufacturer #: WP4456027
This switch controls the stove top surface burner.
$85.26
In Stock


Cooktop Mounting Bracket & Screw
PartSelect #: PS1486367
Manufacturer #: 8186533
$52.36
Special Order
Common Symptoms of models starting with KECC567KBT0
[Viewing 2 of 2]

Keep searches simple. Use keywords, e.g. "leaking", "pump", "broken" or "fit".
Radiant element, 2400 watt, under Ceran glass cok top needed replacement.
turned off power
removed ceran top from cabinet
removed element
installed new element
replaced top
powered up and was done
removed ceran top from cabinet
removed element
installed new element
replaced top
powered up and was done
Parts Used:
-
GEORGE from NEWNAN, GA
-
Difficulty Level:Easy
-
Total Repair Time:15 - 30 mins
-
Tools:Pliers, Screw drivers
164 of 249 people
found this instruction helpful.
Was this instruction helpful to you?
Thank you for voting!
Bad Element
Bought new element and installed. Very simple. Used phillips
screw driver.
screw driver.
Parts Used:
-
Michael from Howell, MI
-
Difficulty Level:Easy
-
Total Repair Time:15 - 30 mins
-
Tools:Screw drivers
74 of 120 people
found this instruction helpful.
Was this instruction helpful to you?
Thank you for voting!
double coil which center coil had burned out on glass top range
Unplug range and remove back panel (4 screws) unplug top burner plugs (2). Open oven door and remove 2 screws from under front of top. Pull top out and up to unhook from back. Remove top and lay cardboard on top of range. Flip over the ranges glass top unit and lay on cardboard. Remove screws from steel bottom and remove from top. Flip ov
... Read more
er steel bottom with burners attached. Remove attaching clips for burner and unscrew them from the burner then reinstall in new burner in the same place as old burner. Lay new burner on top of old burner and remove one wire at a time, transfering it to the matching plug on the new burner. When wiring is done remove old burner and attach 2 clips to steel backing plate. Vacuum off the glass top and reinstall the steel bottom to the glass top. Flip over the top, remove cardboard and slide top into back of range top and lower into place. Attach 2 screws under front. Reattach the tops plugs at the rear and reattach the back panel. Plug in range and slide back into place. Test units and all other burners. Done...
Read less
Parts Used:
-
Frank from Owls Head, ME
-
Difficulty Level:A Bit Difficult
-
Total Repair Time:15 - 30 mins
-
Tools:Nutdriver, Screw drivers
50 of 56 people
found this instruction helpful.
Was this instruction helpful to you?
Thank you for voting!