This genuine OEM microwave turntable tray is a circular plate made of glass and has a diameter of approximately 16 inches. It rotates food in your microwave oven, so that your food cooks evenly. It is...
This roller is located underneath the glass turntable. With the help of the motor, this roller helps to rotate the glass tray. This part takes the place of the coupling.
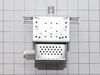
The inverter acts like the brain for the microwave. It sends high voltage to the magnetron to produce heat.
$293.16
In Stock
Questions And Answers for IBMS1455WS0
Ask our experts a question about this model and we'll get back to you as soon as possible!
1 question answered by our experts.
Sort by:
< Prev
1
Next >
Search filter:
Clear Filter
Your search term must have 3 or more characters.
Keep searches simple. Use keywords, e.g. "leaking", "pump", "broken" or "fit".
Sorry, we couldn't find any existing answers that matched.Try using some different or simpler keywords, or submit your new question by using the "Ask a Question" button above!
Alexander
July 12, 2023
The start button doesn't work.
For model number IBMS1455WS0
Hi Alexander, thank you for reaching out. If the start button does not work, you may need to make sure the button holder is properly in place and the wiring is not disconnected. If that does not solve the issue, then you may need to check the button, part number PS12070619, as it might be damaged and may need to be replaced. We hope this helps!
After popping the last few kernals of popcorn, we hear a different kind of pop sound come from our microwave oven. When we looking inside, we found that the glass turntable had broken unevenly in half. Although we didn't understand why it had happned, we did know we'd be without the use of the microwave without a new one. After less th
... Read morean 10 minutes surfing online, I had found the correct part on PartSelect.com and had arranged to have it shipped to me by speedy delivery. Once it arrived, I just popped the new turntable into the microwave and used the box to dispose of the broken one. It could not have been easier and it saved me the cost of a service call and likely further delay.
1)Power off 2) Remove frame covering front timer display - screw on the bottom 3) unscrew time display - 4 screws 4) unsnap lamp spring clip 5)replace lamp