


Models
>
DE406
DE406 Maytag Dryer - Overview
Sections of the DE406
[Viewing 9 of 9].gif "50 CYCLE CONVERSION LIST Diagram and Parts List for Maytag Dryer")


Keep searches simple, eg. "belt" or "pump".

Drum Roller Shaft Washer
PartSelect #: PS11740748
Manufacturer #: WP312535
If you notice that your dryer is noisy or will not tumble, then you may need to replace the drum roller shaft washer. This drum roller shaft washer is just under an inch in diameter and is sold indivi...
$13.79
In Stock


Screw, 8/18 x 3/8
PartSelect #: PS11746840
Manufacturer #: WP90767
This screw is sold individually.
$5.42
In Stock

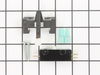
Lid Switch
PartSelect #: PS11723153
Manufacturer #: W10820036
This 3 prong lid switch is used for washing machines that do not have a tub light.
$23.69
In Stock

Rubber Foot Pad
PartSelect #: PS11738859
Manufacturer #: WP210684
The leveling leg pad or foot pad fits over the leveling leg on your washing machine. The foot pad is designed to protect your floor and keep the washing machine level and in place. This foot pad is ju...
$15.28
In Stock

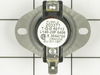
Cycling Thermostat - Limit 135/155
PartSelect #: PS11743793
Manufacturer #: WP694674
Cycling themostats continually cycle the heating element off and on to maintain a constant inner temperature within the dryer. This particular cycling thermostat can be adjusted between 135 and 155 de...
$57.32
In Stock

Adjustable Leveling Leg
PartSelect #: PS2021026
Manufacturer #: 22003428
If your washer shakes or vibrates loudly when it reaches its max speed, make sure the 4 levelling legs are even. Adjust the legs so that the machine is level, and tighten the locking nuts on the legs ...
$18.47
In Stock

Screw
PartSelect #: PS11742755
Manufacturer #: WP489483
This screw is sold individually.
$13.09
In Stock

Lower Dishrack Kit
PartSelect #: PS2378335
Manufacturer #: W10311986
This kit comes with the wheels, bumpers, fold down tine and flexrow retainer.
$277.64
In Stock

 – Part Number: WPY304475")
Cycling Thermostat (Limit: 140-20)
PartSelect #: PS11757518
Manufacturer #: WPY304475
Cycling thermostats continually cycle the heating element off and on to maintain a constant inner temperature. This particular cycling thermostat has a limit of 140 degrees Fahrenheit and a differenti...
$61.54
In Stock

Questions And Answers for DE406
We're sorry, but our Q&A experts are temporarily unavailable.
Please check back later if you still haven't found the answer you need.
Sort by:
- < Prev
- 1
- Next >
Search filter:
Clear Filter
Your search term must have 3 or more characters.
Keep searches simple. Use keywords, e.g. "leaking", "pump", "broken" or "fit".
Sorry, we couldn't find any existing answers that matched.Try using some different or simpler keywords, or submit your new question by using the "Ask a Question" button above!
Elyann
October 18, 2021
Hi! How do we remove the front panel? I see no screws! Thank you!
For model number DE406
Hello Elyann, Thank you for the question. The Front Panel will come off with the side panels. You will need to pull the appliance out and access the screws on the back of the appliance. We hope this helps!
Was this helpful?
Thank you for voting!
- < Prev
- 1
- Next >
Common Symptoms of the DE406
[Viewing 6 of 6]Noisy
Fixed by
these parts
these parts

Show All
Will Not Start
Fixed by
these parts
these parts
Show All
Too hot
Fixed by
these parts
these parts

Show All
Will not drain
Fixed by
these parts
these parts
Show All
Will not agitate
Fixed by
these parts
these parts
Show All
Won’t Start
Fixed by
these parts
these parts
Show All


")


Keep searches simple. Use keywords, e.g. "leaking", "pump", "broken" or "fit".
Dryer wouldn't heat
Since the heating coil is right behind the front door I had to remove all panels starting with the back one to get to it. The back has a lot of tech screws that I removed with the nut driver. The side panels were removed with a phillips screwdriver. The top is held in place with the other panels. The base was shifted away from the fro
... Read more
nt and I released the heating coil case with 4 screws in the front and was able to pull it out of the top to replace it. I cut the old one out with wire cutters and snaked the new one through the ceramic insulators. I was careful not to touch the new one without gloves because the oil from your hands can burn them out more quickly. I screwed the new ones to the contact points while trying not to stretch it too much. I vacuumed the whole dryer out before putting it back together.
Read less
Parts Used:

-
Edith from Grove City, OH
-
Difficulty Level:Difficult
-
Total Repair Time:More than 2 hours
-
Tools:Nutdriver, Screw drivers, Wrench (Adjustable)
59 of 68 people
found this instruction helpful.
Was this instruction helpful to you?
Thank you for voting!
Lid closes, switch wouldn't turn on machine.
Used toothpick for a year to push switch acctuator far enough to engage switch. Broke my foot and found time to order part thru PartSelect. Went from cast to boot and received part 2 days after ordered. Had difficulty with foot and getting to switch. Went back into PartSelect and figured out how to dis-assemmble panels thru the diagrams.
... Read more
Time on my job doesn't, just that their service and expertise that is available to everyone is there to use. Broken bones or not, I will always get my parts and advice from PartSelect. Thanks to PartSelect.
Read less
Parts Used:

-
Kenneth from Wilmington, IL
-
Difficulty Level:Easy
-
Total Repair Time:1- 2 hours
-
Tools:Nutdriver, Screw drivers, Socket set
30 of 46 people
found this instruction helpful.
Was this instruction helpful to you?
Thank you for voting!
Washer would fill up, wash, then stop
I deduced the lid switch was the problem.
I removed the two screws holding the control panel on. Pulled the control panel back.
Disconnected the ground wire of the lid switch.
removed the two top clamps that hold the panel to the top of the machine.
Pulled back the casing (outside of the washer) and placed ... Read more it on it's side on the floor. Here I could reach the switch. Removed old, installed new and reversed the process.
The part that gave me the biggest problem was setting the casing back on to the frame. You have to slide the front part in at the bottome, then lean back the rest of it.
Read less
Parts Used:
-
Glen from Plano, TX
-
Difficulty Level:A Bit Difficult
-
Total Repair Time:30 - 60 mins
-
Tools:Screw drivers
22 of 30 people
found this instruction helpful.
Was this instruction helpful to you?
Thank you for voting!