This drawer slide rail is for the right side of your refrigerator. The drawer slide rail attaches horizontally to the refrigerator wall and supports the drawer so it can easily slide in and out. If th...
This is a manufacturer-approved drawer slide rail for your refrigerator. This slide rail is for the left side of the fridge. All you need to complete this repair is a Phillips screwdriver. Remove the ...
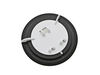
This “Dispenser Door Assembly” (Door Recess Assembly, Ice Door Assembly, Dispenser Door, Refrigerator Dispenser Ice Chute Door Kit, Dispenser Door Flap, Ice Chute Door, Flapper) keeps the room air fro...
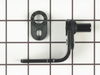
The interior light of your refrigerator is controlled by a switch that is activated when the door is opened and closed. If your refrigerator light will not turn on, there could be an issue with the sw...
This part is the replacement water line for your refrigerator. It is a long plastic tube, which is 5/16 of an inch in diameter. If your refrigerator is leaking, or will not dispense water or ice, you ...
This is a package of twelve Phillips-head screws. They can be used as replacement screws in refrigerators, ice makers, or freezers. Be sure to check that your appliance model is compatible with these ...
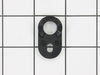
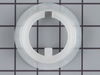
This is the replacement door hinge shim, or riser cam shim for your refrigerator. It is made of metal and is approximately 2 inches in length, and 1 inch in width. Your refrigerator will have a door h...
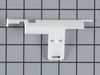
This clip on refrigerator defrost thermostat clips on to your refrigerator's evaporator. It will cut out at 60 degrees Fahrenheit and kick back in when the temperature drops to 32 degrees Fahrenheit.
First, I removed all items on the door shelves and the shelves themselves to reduce the weight of the door. Second, I removed the cover on the top hinge assembly and removed the two screws that secured that hinge. Third I lifted the door from the bottom hinge assembly and placed the door horizontal on the kitchen table to all easier acc
... Read moreess to the bottom of the door. I then removed two screws holding the door closing cam and shim and replaced them with the new parts. Next was to removed the old hinge assembly on the refrigerator itself and replace it with a new hinge assembly. All down hill from this point. Time to reinstall the door, aligning the bottom of the door cam over the hinge assembly and setting the door down on it making sure the door sets on the hinge assembly cams. To the top of the refrigerator. reinstalled the top door hinge assembly and cover, job complete. Total time from start to finish including cleaning the inside of the door and shelves about 30 minutes.
As for the replacing of the light lens in the freezer section. This was almost to easy. I removed the ice drawer from the freezer which exposed the one phillips screw that holds the lens in place. Removed the screw and what was left of the old lens, inserted the new lens from the underneath the ice drawer compartment and screw, replaced the ice drawer and, the task was complete. Total time about 5 minutes.
First of all, the larger white plastic tubes in this thing are 5/16" OD, which no plumbing store seems to stock. At the lower left rear end there are 2 tubes, one for water and one for ice, that are doomed to fail being in proximity of a heat source - they essentially get cooked to the point of becoming brittle and cracking. The smaller
... Read more tube and union can be easily found, but do yourself a favor if the larger one cracks and order the plastic tube and water tube union here, and just cut off the brittle part and amend the old tube using the union.
I applied some tips learned by reading other reviews. So before I started I grabbed my trusty vise grip pliers and a small screw driver. I locked onto the switch actuator, the part that the refrigerator door pushes in, with the vise grips and pulled on it just hard enough to get the screw driver inserted in the right side to push in the c
... Read moreatch clip so the switch could be pulled out further each time the catch clip was depressed to the next detent. Then I used the screw driver on the left site to encourage the switch past the detents on the left and very quickly the switch was out of the mount. The wires from the refrigerator pulled out with the old switch. I unplugged the old switch from the wires and plugged in the new switch and shoved the new switch back into the mount, wiggled it a couple of times to make sure it was secure and the job was done. Once I applied the vise gripes at first, the whole job took less than a minute.