


Models
>
CCE3451B
CCE3451B Jenn-Air Cooktop - Overview
Sections of the CCE3451B
[Viewing 3 of 3]


Manuals & Care Guides for CCE3451B
Click to downloadKeep searches simple, eg. "belt" or "pump".

Screw, 8/18 x 3/8
PartSelect #: PS11746840
Manufacturer #: WP90767
This screw is sold individually.
$5.42
In Stock

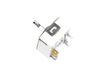
Surface Burner Switch - 240V
PartSelect #: PS12347301
Manufacturer #: W11120791
This surface burner switch, also known as an infinite switch, controls and regulates the heat output of the burners on a stovetop. The user simply adjusts the knob on the user interface panel, which i...
$90.92
In Stock

Cooktop Cleaner
PartSelect #: PS2344170
Manufacturer #: TJ114
Cleans/Polishes all glass, ceramic, porcelain and fiberglass surfaces.
No Longer Available

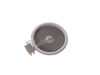
Infinite Knob
PartSelect #: PS11757486
Manufacturer #: WPY04100366
This infinite knob is black in color and is two inches in diameter. It is only an inch high and it has a gray indicator dot.
$26.29
In Stock

6 Inch Element with Limiter
PartSelect #: PS11764912
Manufacturer #: W10823704
This element can be used for the left front or right rear.
$268.43
In Stock


Screw
PartSelect #: PS11742713
Manufacturer #: WP488234
This screw is sold individually.
Size: 8-32 x 1/4 inch.
$9.13
Special Order

Foam Tape - 30"
PartSelect #: PS2078373
Manufacturer #: 71003286
This foam tape is used to help seal the edges of the cook top to the counter top. Also if it doesn't sit properly the tape can give a better fit.
No Longer Available


Questions And Answers for CCE3451B
We're sorry, but our Q&A experts are temporarily unavailable.
Please check back later if you still haven't found the answer you need.
Sort by:
- < Prev
- 1
- Next >
Search filter:
Clear Filter
Your search term must have 3 or more characters.
Keep searches simple. Use keywords, e.g. "leaking", "pump", "broken" or "fit".
Sorry, we couldn't find any existing answers that matched.Try using some different or simpler keywords, or submit your new question by using the "Ask a Question" button above!
Ashley
February 3, 2020
An iron skillet was dropped on glass surface and it cracked. Do you have the replacement glass?
For model number CCE3451B
Hello Ashley, Thank you for the question. I looked up the part and it is listed as No Longer Available/Discontinued sorry. There are no part substitutions listed. Our suggestion here would be to call the manufacturer and see if they can provide you with a substitution for these part numbers. We hope this helps.
Was this helpful?
Thank you for voting!
Related Parts:
DISCONTINUED

$425.58
Special Order
- < Prev
- 1
- Next >
Common Symptoms of the CCE3451B
[Viewing 3 of 3]Element will not heat
Fixed by
these parts
these parts

Show All
Will Not Start
Fixed by
these parts
these parts
Show All
Oven is too hot
Fixed by
these parts
these parts
Show All
Keep searches simple. Use keywords, e.g. "leaking", "pump", "broken" or "fit".
Burner had one temperature--hot, regardless of setting
1. Killed power and removed the regulator's knob, noted the position of the old control.
2. Took off the cover for the center vent and loosened the two screw holding the housing in place--the screws didn't have to come out completely as it is a U-shaped friction hold.
3. Unscrewed the two screws holding the old control switch in ... Read more place--lifted the housing enough to get at the old switch and carefully pulled it loose--it was a front burner so the control switch was about as far back as it could be but still wasn't that hard to get at.
4. Turned the new switch to orient the wire connectors, then, using a needle-nose pliers, removed each friction connector, one at a time, and fitted them on the new switch (note: one of the wires fitted best if it went under as opposed to around the base of the new switch).
5. Replaced the control back through the housing and screwed it in place, making sure the orientation of the control matched the way it looked originally.
6. Slide the housing back over the two screws and tightened, replace vent.
7. Replaced the knob and turned on the power.
(The above took me about twice as long to write as it did to make the repair and I write professionally but am not a professional electrician.)
Also, I bought a second control switch because, given the age of the unit, I'm sure another one will go. The second one will assure that it won't happen :-).
Read less
Parts Used:

-
James H from Oxford, NY
-
Difficulty Level:Really Easy
-
Total Repair Time:Less than 15 mins
-
Tools:Pliers, Screw drivers
105 of 119 people
found this instruction helpful.
Was this instruction helpful to you?
Thank you for voting!
replaced heating element on flat surface stove top
I removed 4 screws and then lifted up the top it gave me access to the element I followed the direction that came with the element (very clear to follow) removed and installed the new element and it worked fine. Remember to unplug the stove if it is electric this is not in the instructions.
Parts Used:

-
dennis from assonet, MA
-
Difficulty Level:Really Easy
-
Total Repair Time:15 - 30 mins
-
Tools:Nutdriver
34 of 47 people
found this instruction helpful.
Was this instruction helpful to you?
Thank you for voting!
Burner Control not Functioning
Simple Repair!
Turn off Power
Remove four screws under panel.
Remove old burner knob.
Drop Burner Panel from range
Remove 5 wire connectors from old burner control
with pliers
Remove 2 screws that held burner control to range
panel
Install new burner control
Rplace two screws to burner ... Read more control
Replace 5 wire connectors to new burner control
Replace 4 screw under panel
Replace knob to new burner control
Turn on electricity
Made wife happy!
Read less
Parts Used:
-
Randall from Mohnton, PA
-
Difficulty Level:Easy
-
Total Repair Time:Less than 15 mins
-
Tools:Pliers, Screw drivers
26 of 33 people
found this instruction helpful.
Was this instruction helpful to you?
Thank you for voting!