


Models
>
ABB2522FEQ
ABB2522FEQ Amana Refrigerator - Overview
Models starting with ABB2522FEQ
Click on the best match to narrow your results.
Keep searches simple, eg. "belt" or "pump".

Light Bulb - 40W
PartSelect #: PS884734
Manufacturer #: 8009
This an authentic OEM 40-Watt replacement light bulb, used in a number of household appliances. It is specially designed to withstand extreme temperatures, which is why these replacement bulbs are mos...
$11.73
In Stock

Replacement Ice Maker
PartSelect #: PS2121513
Manufacturer #: D7824706Q
This ice maker (Ice Maker Assembly, Refrigerator Ice Maker) produces ice cubes that are ejected into the storage bucket. It is located in the freezer section of your appliance, mounted on the freezer ...
$139.15
In Stock

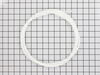
Center Rail
PartSelect #: PS11752912
Manufacturer #: WPW10326469
This OEM Center Rail is a white plastic part which supports the crisper frame, which holds the crisper. Fifteen inches long and white in colour, if broken, the support may no longer hold properly. Re...
$27.51
In Stock

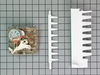
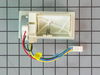
Icemaker Control Assembly
PartSelect #: PS2341896
Manufacturer #: W10190935
The “Icemaker Control Assembly” (Module & Motor Assembly, Ice Maker Control Module, Icemaker Module, Refrigerator Ice Maker Module) is what controls the actions of your ice maker. The control turns th...
$118.52
In Stock

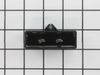
Refrigerator Door Switch
PartSelect #: PS12728638
Manufacturer #: W11384469
Door switch turns the light off when you close the door.
$19.31
In Stock


Door Switch
PartSelect #: PS12731166
Manufacturer #: W11396033
This light switch may also be known as a refrigerator door switch or a light switch kit, and is compatible with your refrigerator. The function of the refrigerator door switch is to turn on the light ...
$27.65
In Stock

Screw, 8/18 x 3/8
PartSelect #: PS11746840
Manufacturer #: WP90767
This screw is sold individually.
$5.42
In Stock

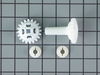
Crisper Frame Support
PartSelect #: PS11738556
Manufacturer #: WP12603701
This genuine OEM crisper frame support provides stability to the crisper drawer in your refrigerator, preventing sagging or collapse under the weight of produce. It is typically located at the bottom ...
$8.86
In Stock

Compressor Start Device and Capacitor
PartSelect #: PS8746522
Manufacturer #: W10613606
This includes both the run capacitor and the start relay. The capacitor helps the compressor kick on and off while maintaining a constant temperature to keep things frozen in your freezer.
The start ...
$75.94
In Stock

Run Capacitor
PartSelect #: PS11743364
Manufacturer #: WP65889-4
This part helps the compressor kick on and off while maintaining a constant temperature to keep things frozen in your freezer. If you are noticing temperature issues with your refrigerator or freezer,...
$66.72
In Stock

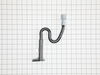
P-Trap Drain Tube Kit
PartSelect #: PS8691807
Manufacturer #: W10619951
The p-trap drain tube kit may also be known as the duck bill, or the drain pipe, and it is compatible with your refrigerator. The function of the p-trap drain kit is to carry the water that has formed...
$39.43
In Stock
Common Symptoms of models starting with ABB2522FEQ
[Viewing 21 of 21]Ice maker not making ice
Fixed by
these parts
these parts

Show All
Leaking
Fixed by
these parts
these parts
Show All
Light not working
Fixed by
these parts
these parts


Show All
Fridge too warm
Fixed by
these parts
these parts


Show All
Will Not Start
Fixed by
these parts
these parts
Show All
Noisy
Fixed by
these parts
these parts


Show All
Freezer not defrosting
Fixed by
these parts
these parts
Show All
Ice maker won’t dispense ice
Fixed by
these parts
these parts

Show All
Freezer section too warm
Fixed by
these parts
these parts

Show All
Door won’t open or close
Fixed by
these parts
these parts


Show All
Fridge and Freezer are too warm
Fixed by
these parts
these parts
Show All
Fridge too cold
Fixed by
these parts
these parts

Show All
Frost buildup
Fixed by
these parts
these parts
Show All
Freezer too cold
Fixed by
these parts
these parts
Show All
Clicking sound
Fixed by
these parts
these parts
Show All
Ice maker dispenses too much ice
Fixed by
these parts
these parts

Show All
Ice maker dispenses too little ice
Fixed by
these parts
these parts
Show All
Too warm
Fixed by
these parts
these parts
Show All
Won’t start
Fixed by
these parts
these parts
Show All
Fridge runs too long
Fixed by
these parts
these parts
Show All
Not dispensing water
Fixed by
these parts
these parts
Show All


Keep searches simple. Use keywords, e.g. "leaking", "pump", "broken" or "fit".
Icemaker producing few or no cubes and often leaving "kling-ons" on ice tray
Interior surface of ice tray felt rough & flaky (coating deteriorated) so cubes would not release.
Unplug appliance.
Remove timer cover by hand pressure @ edge.
Remove single attachment screw & bracket at lower front of icemaker.
Disconnect wiring harness from socket @ rear of compartment.
Tricky part was determin ... Read more ing what type of connection held the other two attachment points along the long edge of the icemaker. I did not have repair manual or useful drawing but looked @ PartsDirect pic of side brackets & used a small mirror to confirm that mine were also some sort of "snap in" attachment.
Remove icemaker unit by pushing upward and outward on the unit. I takes a good bit of pressure and will pop loose, but be careful not to break attachment bracket from freezer wall.
Scavenge shut off bar and wiring harness from old icemaker once you have it out & attach to new one before installing it back in freezer.
Again, you might find a mirror useful to align those pesky snap-in brackets with the new unit.
Since you probably kept your freezer running while waiting for the part, the plastic snap-ins will be cold and brittle. I warmed them up first by applying a dampened cloth heated in the microwave to make them a little more pliable.
A good push of the new unit towards the snap-ins along with some upward force will get it stable.
Reattach the metal screw in bracket & connect the wiring harness to rear plug... and don't forget to plug the whole thing back in.
It will take awhile for the first batch of cubes dump as the timer may need to cycle completely around to get to the fill cycle... be patient.
Dump the first couple of batches of cubes just to make sure you're free of any residue.
Read less
Parts Used:

-
Bernie from Diamond Bar, CA
-
Difficulty Level:Easy
-
Total Repair Time:30 - 60 mins
-
Tools:Nutdriver
801 of 885 people
found this instruction helpful.
Was this instruction helpful to you?
Thank you for voting!
No ice
removed flap door in front of icemaker...removed 3 screws with bolt heads...removed one additional screw with bolt head and ice unit slid out. I removed motor unit (pops out no screws). Replaced and had ice within 3 hours.
Parts Used:

-
Daniel from Suwanee, GA
-
Difficulty Level:Easy
-
Total Repair Time:15 - 30 mins
-
Tools:Screw drivers, Socket set
557 of 665 people
found this instruction helpful.
Was this instruction helpful to you?
Thank you for voting!
Freezer is cold, Refridgerator is not as cold as it should be
Having seen this problem before in other equipment so I had an idea where to look. Problem: the automatic defrost function was not operating. Looking through openings in the back panel of the freezer compartment, you could see the evaporator coils and fins were a solid chuck of ice. There are three logical components to check. Heater
... Read more
element, thermostat (located just above the evaporator) and a relay on the control board (located in the fridge control panel). Checked the heater with an ohm meter -- OK. The thermostat closes the circuit at around 20 degrees and opens at around 32 degrees. Pulled out the thermostat, wiring, fan unit. Everything unplugs, unscrews, and unclips, don't cut wires. Put the whole assembly in a friends freezer for an hour or so to see if the thermostat closes -- OK. Problem had to be with the control board. Replaced control board, reprogrammed it per included instruction. Everything is working again.
Read less
Parts Used:

-
Russell from Hardinsburg, KY
-
Difficulty Level:A Bit Difficult
-
Total Repair Time:More than 2 hours
-
Tools:Screw drivers
353 of 428 people
found this instruction helpful.
Was this instruction helpful to you?
Thank you for voting!