This OEM 40 watt appliance light bulb is used for some ranges, refrigerators, freezers, and microwaves. Simply locate the existing bulb, unscrew it from its socket, and replace with new light bulb. If...
Oven racks can become rusted or damaged from constant use, and need to be properly maintained and cleaned to keep them working properly. If you notice that your oven rack has been damaged or rusted, t...
This part is a replacement electronic clock/timer for your oven. The clock timer will display the time, and can be used to set a timer. If the clock will not start, will not allow you to program the t...
This is an oven igniter for various ranges. This part is used to ignite the burner within gas ovens. If your oven is not heating properly this igniter has likely failed and is in need of replacement. ...
The surface Meduim 9.5K burner cap is located on the top of the burner head and is used in ranges and ovens. The burner cap helps spread out the burner flame for even heating, and protects the burner...
The anti-tip bracket kit comes with one metal bracket and two installation screws, and is sourced directly from the genuine manufacturer. It prevents the freestanding oven, range, or stove from tippin...
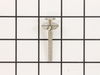
This part is the igniter/orifice mounting screw for your cooktop or range. It is approximately ½ an inch in length and is made of metal. The mounting screw connects the orifice to the cooktop. If the ...
$12.25
In Stock
Questions And Answers for FFGF3047LSF
We're sorry, but our Q&A experts are temporarily unavailable.
Please check back later if you still haven't found the answer you need.
3 questions answered by our experts.
Sort by:
< Prev
1
Next >
Search filter:
Clear Filter
Your search term must have 3 or more characters.
Keep searches simple. Use keywords, e.g. "leaking", "pump", "broken" or "fit".
Sorry, we couldn't find any existing answers that matched.Try using some different or simpler keywords, or submit your new question by using the "Ask a Question" button above!
Hilton
June 15, 2021
I need new replacements burner caps for each burner (4). Each burner is a different size.Are they sold as a package or individually, if yes? the part #, if no?. individual part # for
each cap. price quote. thanks
For model number FFGF3047LSF
Hi Hilton, thank you for your question. The burner caps for your range are sold individually. The part number for the front-right burner cap is PS2581742. The current cost for the cap is $34.12. The part number for the right-rear burner cap is PS2581737. The current cost for the cap is $28.71. The part number for both the left front and rear burner caps is PS2581740. The current cost for the cap is $31.47 each. To place an order for the burner caps, you may order them either online or by calling our customer service line and anyone will be happy to assist you. We hope this helps! If you have any questions, please let us know.
Propane stove doesn't heat above 320. Replaced the temperature sensor and ignitor.
For model number FFGF3047LSF
Hi Tim, thank you for the question. We would recommend checking the oven safety valve, part number PS446204. It controls the gas flow to the bake and broil burners in the oven. You may need to replace it to fix the issue. We hope that helps!
The stove works perfectly. I can turn the oven on but it does not heat up. Is this something that can be fixed or just bug a new stove.
For model number FFGF3047LSF
Hello Chantay, thank you for reaching out. Based on our understanding of the issue, we would suggest checking the temperature sensor, part number PS11731754, to solve the problem. We hope this helps!
I am an HVAC tech by trade so it wasn't difficult to diagnose problem with safety valve. The hard part was being without an oven for a week. Repair was simple and effective--oven works good as new. Shut off gas and unplugged oven. Removed floor of oven between broiler and bake section, used wrenches to disconnect gas line from saf
... Read moreety valve in back of oven, used philipps head screwdriver to remove burner assembly and gas valve, reversed process to replace. Checked out operation--OK.
The repair of the oven was really easy . I removed a total of 7 screws with a 1/4 inch nut driver to remove the back cover of the instrument panel. I then unplugged the wires from the from the oven control and with a phillups screw driver I removed 4 screws that hold the oven control,the face plate with the words on it has to be taken of
... Read moref the old control and put on the new one . I then installed the new oven control by putting the 4 screws back on and plugging back the wires. I then replaced the back cover with the 7 screws and plugged the power back in the outlet, The clock has to be adjusted and your done.
Turned off power, took back off stove removed old probe. I had to splice wires since new probe ends did not match up. the instructions were to splice the wires. I had the breaker off for about 3 hours. this is not in the instructions, but being a widow, I had to ask a few people why it would not come on after I connected the wir
... Read morees. After waiting, I turned the breaker on and my range came back on.