Models > C2S980SEM1SS > Symptoms > Will Not Start

Parts That Fix General Electric Range C2S980SEM1SS Will Not Start

Will Not Start is a commonly reported symptom for the C2S980SEM1SS General Electric Range, and we have put together a full guide on how to fix this. This advice is based on feedback from people who own this exact appliance. We have listed the most common parts for your C2S980SEM1SS General Electric Range that will fix Will Not Start. We have included repair instructions, and helpful step-by-step video tutorials. If you are experiencing this issue, not to worry, DIYers just like you have fixed this, and shared their experience to help you!

Fixes Symptom 44% of time
★★★★★
★★★★★
10 Reviews

Rated by 10 customers 


Easy 

30 - 60 mins 

Ratings submitted by customers like you who bought this part.   

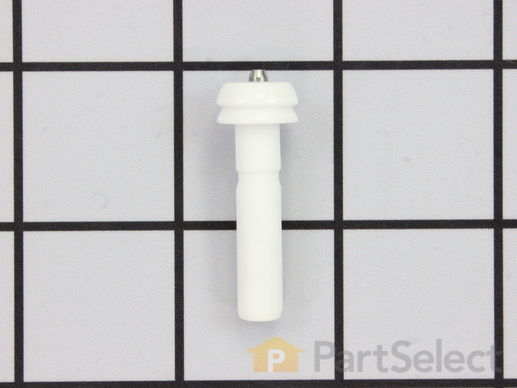
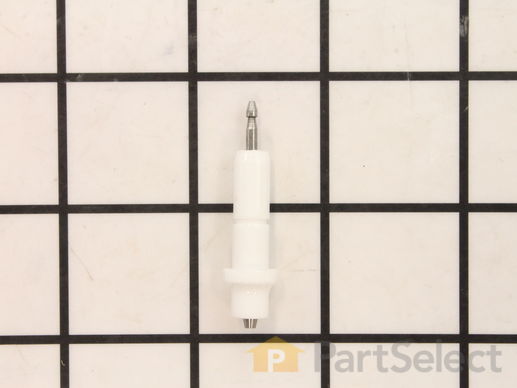
The top burner spark electrode, also known as a range surface burner igniter, is designed for use in your gas range. The function of this part is to provide the spark that lights the surface burner. If your gas range will not start, or if the igniter glows but will not light, you may need to replace the top burner spark electrode. This part is sold individually. This product is white in color and measures approximately 1-1/2-inches in length by 1/2-inch in width. Be sure to disconnect the gas supply to the range before you begin this repair. This is an OEM part sourced directly from the manufacturer.

  No Longer Available
PartSelect Number PS952858
Manufacturer Part Number WB13K10014

Customer Repair Stories

Change bad/broken igniter on gas stove top burners

Very simple repair with no tools required. Turn off power to stove. Remove grates, remove burner, pull old Top Burner Spark Electrode up being careful not to jerk it up hard - wiggle if necessary, unplug wire from old electrode, plug wire into new electrode making sure it fits snug - if not, squeeze it closed a little at a time until it fits snug, push new igniter into place being careful not to force it and crack the ceramic body. Install burner being careful not to damage the electrode, Install grates. Turn power back on and test to make sure it works. It took me all of 15 minutes to change 2 burner spark electrodes. The only bad thing about this repair is that the shipping costs as much as the parts.
  • James from Kaplan, LA
  • Difficulty Level:
    Really Easy
  • Total Repair Time:
    Less than 15 mins
6 of 6 people found this instruction helpful.
Was this instruction helpful to you?
Thank you for voting!

burner would not lite

openend stove top disconnected wire pushed out old sparker inserted new one closed lid game over
  • Glen from Kenner, LA
  • Difficulty Level:
    Really Easy
  • Total Repair Time:
    Less than 15 mins
  • Tools:
    Screw drivers
23 of 33 people found this instruction helpful.
Was this instruction helpful to you?
Thank you for voting!
Fixes Symptom 11% of time
★★★★★
★★★★★
91 Reviews

Rated by 36 customers 


Really Easy 

15 - 30 mins 

Ratings submitted by customers like you who bought this part.   

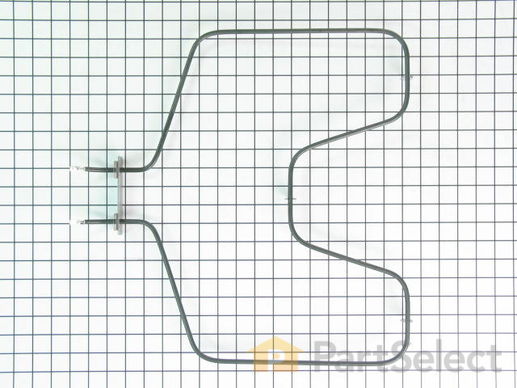
The bake element is located on the bottom of the oven. If your oven will not heat properly it may be due to a faulty or damaged baking element. If you can see that the element has been separated or blistered, you should replace the part immediately. If there is no visible damage, turn the oven on and check to see if the element heats evenly. If the element is not heating evenly, or if it is not heating at all, it will need to be replaced. This element is 19 inches wide x 19 inches long, and has male spade push on terminals.

$ 123.08
  On Order
PartSelect Number PS249238
Manufacturer Part Number WB44K10005

Replacing your General Electric Range Bake Element - Push On Terminals - 240V

Replacing your Bake Element - Push On Terminals - 240V

Customer Repair Stories

Broken heating element

1)Turn off power to stove
2)remove 2 bolts holding heating element
3)pull element out of the back of the oven about 8" so that the wire connects is visable
4)pull wire clips off of heating element and remove element from the oven
5)put wire clips on the new heating element
6)push new heating element back into the holes in the back of the oven
7)screw botls back into the oven holding the heating element in place
8)Turn power back on
  • Paul from anna, TX
  • Difficulty Level:
    Really Easy
  • Total Repair Time:
    15 - 30 mins
  • Tools:
    Nutdriver, Pliers
73 of 85 people found this instruction helpful.
Was this instruction helpful to you?
Thank you for voting!

Lower bake Element would not heat.

First I slid the stove out and unpluged it, then removed two screws,slid out element, disconected two wires, slid new element in to place, pluged two wires in ,put into place and installed two screws, pluged stove back in, and turned on to try. Works perfect.
  • Ronald from Nassau, NY
  • Difficulty Level:
    Really Easy
  • Total Repair Time:
    Less than 15 mins
  • Tools:
    Nutdriver, Pliers
221 of 245 people found this instruction helpful.
Was this instruction helpful to you?
Thank you for voting!
Fixes Symptom 9% of time

Rated by 4 customers 


Easy 

1- 2 hours 

Ratings submitted by customers like you who bought this part.   

Sold individually.

$ 13.74
  In Stock
PartSelect Number PS3510420
Manufacturer Part Number WB01K10112

Customer Repair Stories

some of electrodes not working at times,found were bad,wires had some insulation missing, clips looked burnt,found all new parts replaced

the electrodes on this model have to be removed before you can raise cooktop, once cooktop is raised remove wire from burner bracket, use needle nose pliers to squeeze bottom of clip,remove &replace with new parts.
  • Dana from LEEDS, AL
  • Difficulty Level:
    Really Easy
  • Total Repair Time:
    More than 2 hours
  • Tools:
    Pliers
1 person found this instruction helpful.
Was this instruction helpful to you?
Thank you for voting!
Fixes Symptom 7% of time
★★★★★
★★★★★
2 Reviews

Rated by 4 customers 


Easy 

1- 2 hours 

Ratings submitted by customers like you who bought this part.   

$ 58.56
  In Stock
PartSelect Number PS11729094
Manufacturer Part Number WB13X26360

Customer Repair Stories

Part does not look like the part that needs to be replaced

I have no clue what wire goes where because there is no thing to refer to or instructions of any kind . I have not been able to install the part.
  • P from FULLERTON, CA
  • Difficulty Level:
    Really Easy
  • Total Repair Time:
    30 - 60 mins
1 of 2 people found this instruction helpful.
Was this instruction helpful to you?
Thank you for voting!

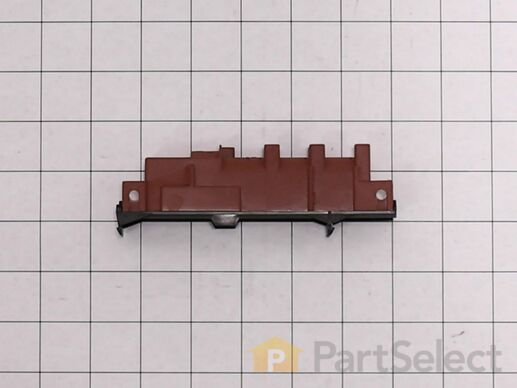
One burner would not light from spark. All other burners lite with spark.

First I checked that the wire and sparker was working by switching the wires on top of the range. I did this by pulling out the sparker switching it from the back working burner on the same side. The same burner would not light so I knew it was not the sparker.

Then watch a bunch of videos and found this gal to be the most helpful on how to take apart my exact stove.
Go here: https://www.youtube.com/watch?v=WRGfuhUzEaY

I did not take everything apart like she did. I ordered the spark module and just replaced it following her method to take off the back, switch the wires to the new module, then put everything back together again.

All burners have been working perfectly since the fix.
  • Thomas from DEARBORN, MI
  • Difficulty Level:
    Easy
  • Total Repair Time:
    30 - 60 mins
  • Tools:
    Nutdriver
2 of 3 people found this instruction helpful.
Was this instruction helpful to you?
Thank you for voting!
Fixes Symptom 7% of time
★★★★★
★★★★★
13 Reviews

Rated by 3 customers 


Easy 

15 - 30 mins 

Ratings submitted by customers like you who bought this part.   

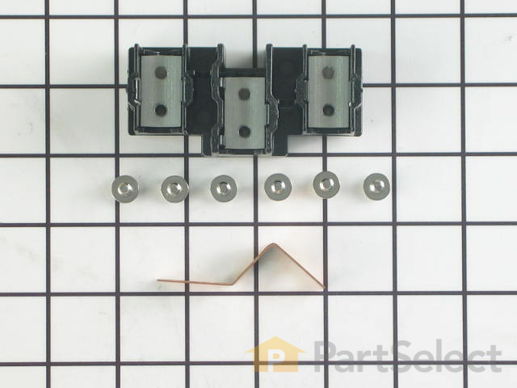
This part provides a way of connecting individual electrical wires and offers protection of the device from electrical surges (voltages and/or currents).

$ 56.83
  In Stock
PartSelect Number PS953027
Manufacturer Part Number WB17T10011

Customer Repair Stories

Original terminal block plastic shielding melted, protecting appliance when the wires overheated.

Safety first * Unplugged 220 VAC from outlet. Removed shield cover screws with 1/4" hex nut driver (5 screws). Removed all 6 silver screws from terminal block with 1/4" nut driver, freeing all wires. Removed the green ground screw and ground bracket from center terminal. Cut away (using the drill) melted original terminal block plastic to access the 2 black 1/4" nuts holding original terminal block onto appliance. Discarded the original damaged terminal block. Attached the new terminal block, aligning the mounting holes and the terminal block the same way the original terminal block was lined up and re-used the black 1/4" nuts (original used because the replacement package did not include new black screws). I bought a new appliance cord, since the original cord overheated. Reattached all wires using the 6 new silver screws. Start with the middle terminal by attaching the appliance wires and the ground bracket. The ground must be attached to the bracket and the bracket bridges between the terminal block and the range body. Reattached shield cover. Plugged in appliance. Note: it doesn't matter which outside wire attaches to the outside terminals (both are hot), but the middle wire (neutral) must attach to the middle terminal. However, the ring terminal should be flush on the terminal block so you don't bend the ring.
  • Brian from DOVER, PA
  • Difficulty Level:
    Really Easy
  • Total Repair Time:
    30 - 60 mins
  • Tools:
    Nutdriver
5 of 7 people found this instruction helpful.
Was this instruction helpful to you?
Thank you for voting!

terminal block melted

The existing terminal block on my Ge oven/Range had melted due to a loose wire causing sparking and starting the plastic casing of the terminal block on fire and melting it, Part select made the part easy to find and had it at my house in 2 days. All I had to do was remove six screws to take the back sheet metal cover off of the oven. Unscrew the terminal connections remove two mounting screws that held the terminal on to the oven body. This was a little trickier than it should have been because the melted plastic had reformed making it very hard to access the mounting screws. i then mounted the new piece and plugged the oven in, it took 15 minutes and was very easy. definitely saved me at-least a $100 for the service call i would have made if finding the part wasn't so convenient
  • jonathan from willow springs, IL
  • Difficulty Level:
    Easy
  • Total Repair Time:
    Less than 15 mins
  • Tools:
    Nutdriver, Screw drivers
53 of 68 people found this instruction helpful.
Was this instruction helpful to you?
Thank you for voting!
Fixes Symptom 7% of time
★★★★★
★★★★★
9 Reviews

Rated by 8 customers 


Really Easy 

Less than 15 mins 

Ratings submitted by customers like you who bought this part.   

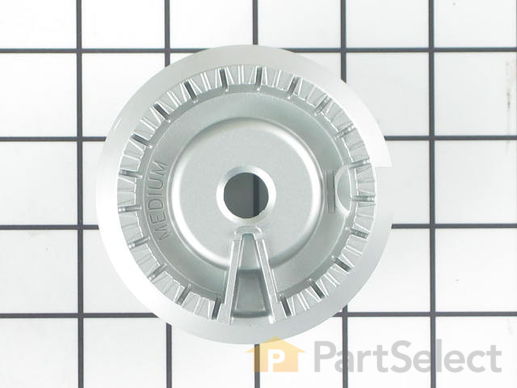
This burner head, or surface burner, is used in ranges and ovens. The burner sends gas through the holes and slots to create an equal flame across the cooking area. If the gas igniter glows but will not light up, or there are heating inconsistencies, replacing the burner head could be the solution to your problem. No tools are required for this installation. To change the burner, first lift the grate and take the burner cap off. Next, lift the burner away from the cooktop. To set the new burner in place correctly, check the locating tab that fits into the V-shaped notch and make sure the igniter fits into the cut-out. Refer to the diagram provided by the manufacturer for further instructions.

$ 39.85
  In Stock
PartSelect Number PS1020327
Manufacturer Part Number WB16K10055

Replacing your General Electric Range Burner Head - Medium - 9500

Replacing your Burner Head - Medium - 9500

Customer Repair Stories

Burner on stove not working correctly

Order parts and installed - no tools needed - completed repairs less than 1 minute
  • Trevor from Eldersburg, MD
  • Difficulty Level:
    Really Easy
  • Total Repair Time:
    Less than 15 mins
4 of 6 people found this instruction helpful.
Was this instruction helpful to you?
Thank you for voting!

Burnt burner

Just put it on. Quite proud of myself for figuring out what and how to get the part however! The website was very helpful.
  • Janine from Wind Gap, PA
  • Difficulty Level:
    Really Easy
  • Total Repair Time:
    Less than 15 mins
7 of 12 people found this instruction helpful.
Was this instruction helpful to you?
Thank you for voting!
Fixes Symptom 7% of time

Rated by 3 customers 


Really Easy 

15 - 30 mins 

Ratings submitted by customers like you who bought this part.   

$ 35.17
  In Stock
PartSelect Number PS1022004
Manufacturer Part Number WB13T10065

Customer Repair Stories

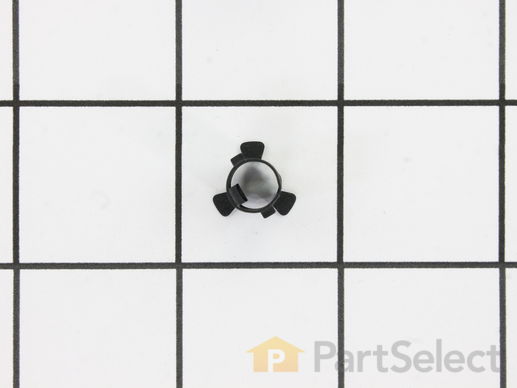
The electrode had broke

I unscrewed the base where the electrode was attached to detached the electrode detached the wire to the electrode inserted new electrode with holding spring and clamp attached wire to electrode.
I then put the base back on top and screwed in the two screws assembled the remaining parts and turned on the stove unit and it worked I am very happy.
  • O.Robert from Montrose, PA
  • Difficulty Level:
    Really Easy
  • Total Repair Time:
    15 - 30 mins
  • Tools:
    Pliers, Screw drivers
1 person found this instruction helpful.
Was this instruction helpful to you?
Thank you for voting!

Failed ignighter

Repair is easy. The keeper ring installation while holding the spring down was tricky. An extra set of hands is helpful in holding and replacing the keeper ring.
  • Connie from WESTFIELD, IN
  • Difficulty Level:
    Easy
  • Total Repair Time:
    15 - 30 mins
  • Tools:
    Pliers
1 person found this instruction helpful.
Was this instruction helpful to you?
Thank you for voting!
Fixes Symptom 4% of time
★★★★★
★★★★★
10 Reviews

This also comes with Spark Electrode.

  No Longer Available
PartSelect Number PS1018858
Manufacturer Part Number WB16K10053
Fixes Symptom 4% of time
★★★★★
★★★★★
5 Reviews

Rated by 4 customers 


Really Easy 

Less than 15 mins 

Ratings submitted by customers like you who bought this part.   

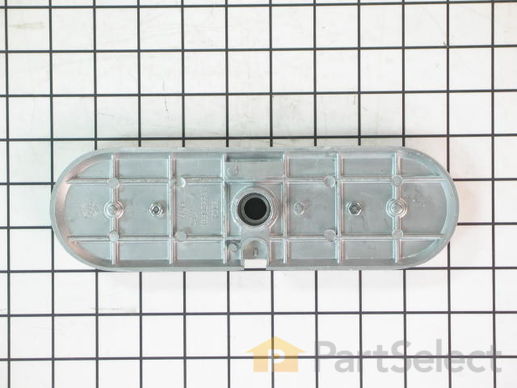
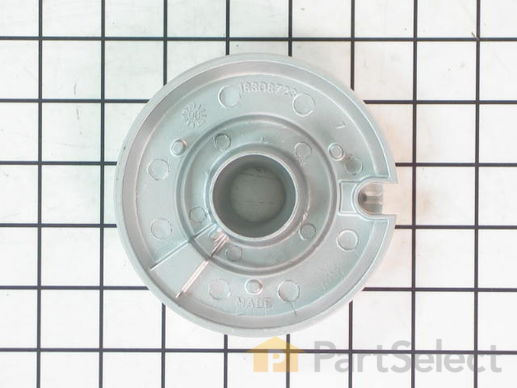
This is a replacement vision burner or surface burner head for your gas range. It is silver in color and approximately 4.5 inches in diameter. This burner is sold individually. The burner head distributes gas to create an even flame across the cooking area. If you notice that your food is not cooking evenly, or you are not getting an evenly distributed flame, you may need to replace the burner. The burner is located beneath the burner cap, below the grate. To remove the burner, simply remove the grate and the burner cap, then lift the burner head out. Replace it with the new burner, and reinstall the cap and grate. This is an OEM part sourced directly from the manufacturer.

$ 62.02
  In Stock
PartSelect Number PS1480987
Manufacturer Part Number WB16K10062

Customer Repair Stories

Gas burner wasn’t burning properly

I ordered the new burner head and replaced it and now it works perfectly.
  • Karin from ARUNDEL, ME
  • Difficulty Level:
    Really Easy
  • Total Repair Time:
    Less than 15 mins
1 person found this instruction helpful.
Was this instruction helpful to you?
Thank you for voting!

burner had hot spots where the matieral melted some cause a distorted flame that would spit sputter

Remove the top grate and remove the top burner plate and then pull the burner out and remove the torx screw and adapter install onto the new burner and place back on the stove , good to go.
  • Dan from WARROAD, MN
  • Difficulty Level:
    Really Easy
  • Total Repair Time:
    Less than 15 mins
  • Tools:
    Nutdriver
2 of 2 people found this instruction helpful.
Was this instruction helpful to you?
Thank you for voting!