Hotpoint Refrigerator Hoses and Tubes

Hotpoint Appliance Parts

Popular Hotpoint Refrigerator Hoses and Tubes

Your Price
$9.05
  In Stock
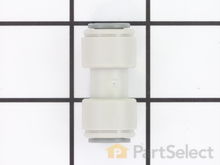
Hotpoint Refrigerator Union Connector - 5/16 Inch to 5/16 Inch
★★★★★
★★★★★
10 Reviews
PartSelect Number PS758446
Manufacturer Part Number WR02X11330
Quick connector for plastic water line - 5/16" to 5/16"
Fixes these symptoms
  • Ice maker not making ice
  • Leaking
  • Not dispensing water
  • See more...
Installation Instructions
Marty from West Bloomfield, MI
Internal water lines brittle, cracked, leaking
First of all, the larger white plastic tubes in this thing are 5/16" OD, which no plumbing store seems to stock. At the lower left rear end there are 2 tubes, one for water and one for ice, that are doomed to fail being in proximity of a heat source - they essentially get cooked to the point of becoming brittle and cracking. The smaller tube and union can be easily found, but do yourself a favor if the larger one cracks and order the plastic tube and water tube union here, and just cut off the brittle part and amend the old tube using the union. Read more...
Your Price
$25.09
  In Stock
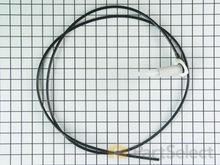
Hotpoint Refrigerator Grommet / Tube Assembly
★★★★★
★★★★★
5 Reviews
PartSelect Number PS292253
Manufacturer Part Number WR17X11168
This is a replacement fill tube and grommet assembly for your refrigerator. This part acts your water line to your ice maker. If you’re noticing water in the back of the refrigerator or any kind of leak, or if your ice bucket isn’t filling up with as much ice, you may need to change out the fill tube and grommet assembly. When you purchase this part, you get the water line, as well as the fill tube and grommet. This is an OEM part sourced directly from the manufacturer.
Fixes these symptoms
  • Ice maker not making ice
  • Leaking
  • Not dispensing water
  • See more...
Installation Instructions
Chuck from Coraopolis, PA
Water leaking under the refrigerator only when water was called from water dispenser
To do this repair, I shut off the water supply first. After removing the back panel, I disconnected the first water tank (PS291933) tube from the valve near the back of the refrigerator by pushing the white ringclamp towards the valve which released the tubing (once disconnected I could clearly see the hairline crack in the tube responsible for the water). I then disconnected the other water tank tube from the connector located in the bottom left front of the refrigerator. Then, after removing the bottom shelves and compartments, I unscrewed the two screws securing the water tank to the inside back wall. Then I carefully pulled the water tank and the tubing out from inside the refrigerator. The installation of the new water tank was essentially the reverse of the above, with the exception that I had to use a 2x4 to prop up the refrigerator and my 7-year old daughter's hand to help guide the tube to the front of the fridge. One of the lines did leak initially, but stopped after I removed and reconnected the tube more securely. My only unfinished business with this part of the repair (which I'm not losing sleep over) is I'm not sure where to find the 'insulation wrap' that was around the water tank tubes inside the fridge.

During my investigation of the water tank, I also noticed the tube on the outside back of the fridge going to the icemaker was leaking, so I bought a new grommet & tube (PS292253). Installation was easier than the water tank, but was more of a mystery until the part showed up and I saw that only adhesive tape was used to secure the grommet to the hole in the outside back of the freezer near the icemaker. Again, only had to disconnect the tube from the valve at the bottom of the fridge and pull out the grommet from the top outside. (I did remove the ice cube tray from the inside to avoid contaminating it during the work). Then I connected the new tubing and secured the grommet to the back of the fridge using the adhesive tape. So far no leaks!


I also will likely need to add that WR49X10173 part to hopefully avoid my water dispensor from freezing in the future.
Read more...
Your Price
$24.94
  In Stock
Hotpoint Refrigerator Plastic Tubing - 5/16 Inch
PartSelect Number PS292878
Manufacturer Part Number WR17X2891
This part is the replacement water line for your refrigerator. It is a long plastic tube, which is 5/16 of an inch in diameter. If your refrigerator is leaking, or will not dispense water or ice, you may have a damaged water line. When you replace the water line, you may want to pick up a new water tube union as well. You can use a utility knife to cut the old water line where it is damaged, and use the union to attach the new water line to the old one. This tubing is sold individually and is an OEM part.
Fixes these symptoms
  • Ice maker not making ice
  • Leaking
  • Not dispensing water
  • See more...
Installation Instructions
Marty from West Bloomfield, MI
Internal water lines brittle, cracked, leaking
First of all, the larger white plastic tubes in this thing are 5/16" OD, which no plumbing store seems to stock. At the lower left rear end there are 2 tubes, one for water and one for ice, that are doomed to fail being in proximity of a heat source - they essentially get cooked to the point of becoming brittle and cracking. The smaller tube and union can be easily found, but do yourself a favor if the larger one cracks and order the plastic tube and water tube union here, and just cut off the brittle part and amend the old tube using the union. Read more...
Your Price
$16.73
  In Stock
Hotpoint Refrigerator Plastic Tubing
★★★★★
★★★★★
1 Review
PartSelect Number PS11747816
Manufacturer Part Number WPB5705307
This part supplies water to refrigerator components that require water, such as the ice maker and water dispenser. If you notice a leak coming from your refrigerator, the plastic tubing that feeds your water and ice dispenser might need to be replaced. This part is made of clear plastic and is 1/4 inch thick, and 8 1/2 feet long. Make sure to disconnect power to the refrigerator and shut off the water supply prior to installing this part. Safely store any perishable food items that could deteriorate while the power to the refrigerator is disconnected. Work gloves are recommended to protect your hands during this installation.
Fixes these symptoms
Installation Instructions
Michael from Tucson, AZ
leak from back of refrigerator where water line enters ice compartment
replaced old water fill tube for ice maker because it would clog with frozen water which would result in leaking from back of refrigerator where water line for ice maker entered refrigerator. Parts arrived faster than anticipated from parts select. New part was made differently (up-graded) so that water would not freeze. removed old fill tube and replaced with new. replaced water tubing and secured. leak is no longer present and I do not anticipate further issues from this problem. Thanks Parts Select Read more...
Your Price
$32.01
  In Stock
Hotpoint Refrigerator Fill Tube Grommet
★★★★★
★★★★★
4 Reviews
PartSelect Number PS299055
Manufacturer Part Number WR2X8474
This fill tube grommet is used on the icemaker.
Fixes these symptoms
Installation Instructions
Stephen from Raleigh, NC
The icemaker was leaking water into the freezer, causing the freezer to be covered inside with ice.
The actual repair was a snap. However, be sure you check to make sure all of the parts are there. The two electrical adapter/connectors were missing from the water valve package, so I could not complete the job until a new valve could be shipped. The two adapters are essential to proper operation of the water valve. New ones arrived in 3 days.

DISASSEMBLY:

1. Unplug the refrigerator.
2. Shut off the water supply to the icemaker.
3. Remove the screws holding the cardboard cover onto the lower back side of the refrigerator, using a nut driver.
4. Disconnect the water supply line from the top of the water valve.
5. Remove the screw holding the water valve bracket onto the back of the refrigerator.
6. Unscrew the two water feed tubes from the water valve (one goes to the icemaker and one to the cold water dispenser).
7. Pull the two electrical connectors straight out of the back of the water valve. They are color-coded, but it won't hurt to label them with a small piece of masking tape.

NOTE:

Since I wanted this to be fixed and to not have to deal with it for years to come, I also replaced the plastic tubing running up the back of the refrigerator, the grommet that goes through the back of the refrigerator into the freezer compartment, and the water tube the pours water into the icemaker's tray - and it was well worth the few extra dollars and 10 extra minutes of work. To do this part:

1. Inside the freezer section, loosen the two screws holding the icemaker to the back of the freezer (you do not need to remove the screws, but it won't hurt anything if you do remove them).
2. Slide the icemaker upward until it clears the two screws enough that you can set the icemaker out of the way.
3. Grasp the 1/2-inch plastic tube that points toward the front of the freezer and pull it toward you until it comes out.
4. At the back of the refrigerator, pull out the plastic grommet that held the tube you just removed, near the top of the refrigerator.
5. Remove the thin water tube that runs from the water valve up the back of the refrigerator to the grommet.

ASSEMBLY:

1. Basically, reverse the order of disassembly.

CONCLUSION:

It took longer to type the instructions than it would have taken to do the job. If only the elctrical connectors had been there the first time.
Read more...
Your Price
$10.65
  In Stock
Hotpoint Refrigerator TUBE DRAIN
★★★★★
★★★★★
2 Reviews
PartSelect Number PS758523
Manufacturer Part Number WR02X11426
Fixes these symptoms
Your Price
$24.21
  In Stock
Hotpoint Refrigerator Water Line Plastic Tube- 1/4 Inch
★★★★★
★★★★★
1 Review
PartSelect Number PS964278
Manufacturer Part Number WR17X11625
Fixes these symptoms
Your Price
$13.85
  In Stock
Hotpoint Refrigerator TUBE DRAIN
PartSelect Number PS963286
Manufacturer Part Number WR02X11476
Your Price
$19.55
  In Stock
Hotpoint Refrigerator TUBE PLASTIC
PartSelect Number PS964160
Manufacturer Part Number WR17X11492
Installation Instructions
George from Islamorada, MD
Water leak caused by earlier tube replacement destroying retaining washer in valve
This was a simple parts replacement. I had replaced the cracked plastic tube a few weeks earlier and destroyed the retaining star washer inside the solenoid valve while removing the old one. It worked for a while and then started to leak when the tube had partially worked its way out. The star washer is not a replaceable part so this repair was simply replacing the valve with a new one. It is very straight forward - disconnect the electric plug, remove the old valve, insert the tube in the new valve (it goes through the plastic bushing in the valve - do not remove the bushing - it can easily be mistaken for a shipping plug) and reattach the supply line being careful to avoid kinking it. Reattach the valve, the electric plug and support clips for both the supply line and the plactic line to the ice maker. Read more...
Your Price
$24.92
  In Stock
Hotpoint Refrigerator Water Line - 1/4"
★★★★★
★★★★★
1 Review
PartSelect Number PS292409
Manufacturer Part Number WR17X1948
This water line 1/4, also known as a ice maker fill tube, is used in freezers and refrigerators. The tube directs the water into the ice maker cup during the cycle in which it fills the cup. The water line height is 0.6 inch and it weighs 0.1 lbs. As a safety precaution, unplug your appliance from the power source before installing this part. Remember to safely store food when it is removed from fridge or freezer. Refer to the installation instructions provided by the manufacturer for further guidance and accuracy.
Fixes these symptoms
Installation Instructions
RUSSELL from BLACK HAWK, SD
water line cracked
I loosened the compression nut on the valve with my fingers and pulled the water line free from the valve. On the other end, I just pulled it from the hose clamp. Installation in reverse. Force the water line into the fitting on top, Slide the old nut over the line on the bottom. Screw the nut onto the valve. Reach inside the freezer and turn on the ice maker. Done. Before replacing the cardboard grill, you should vacuum the coils on the bottom, front and back. If practical, push it outside and blow it out with an air compressor or a leaf blower. Read more...

Related Hotpoint Refrigerator Parts